Wednesday, 24 June 2015

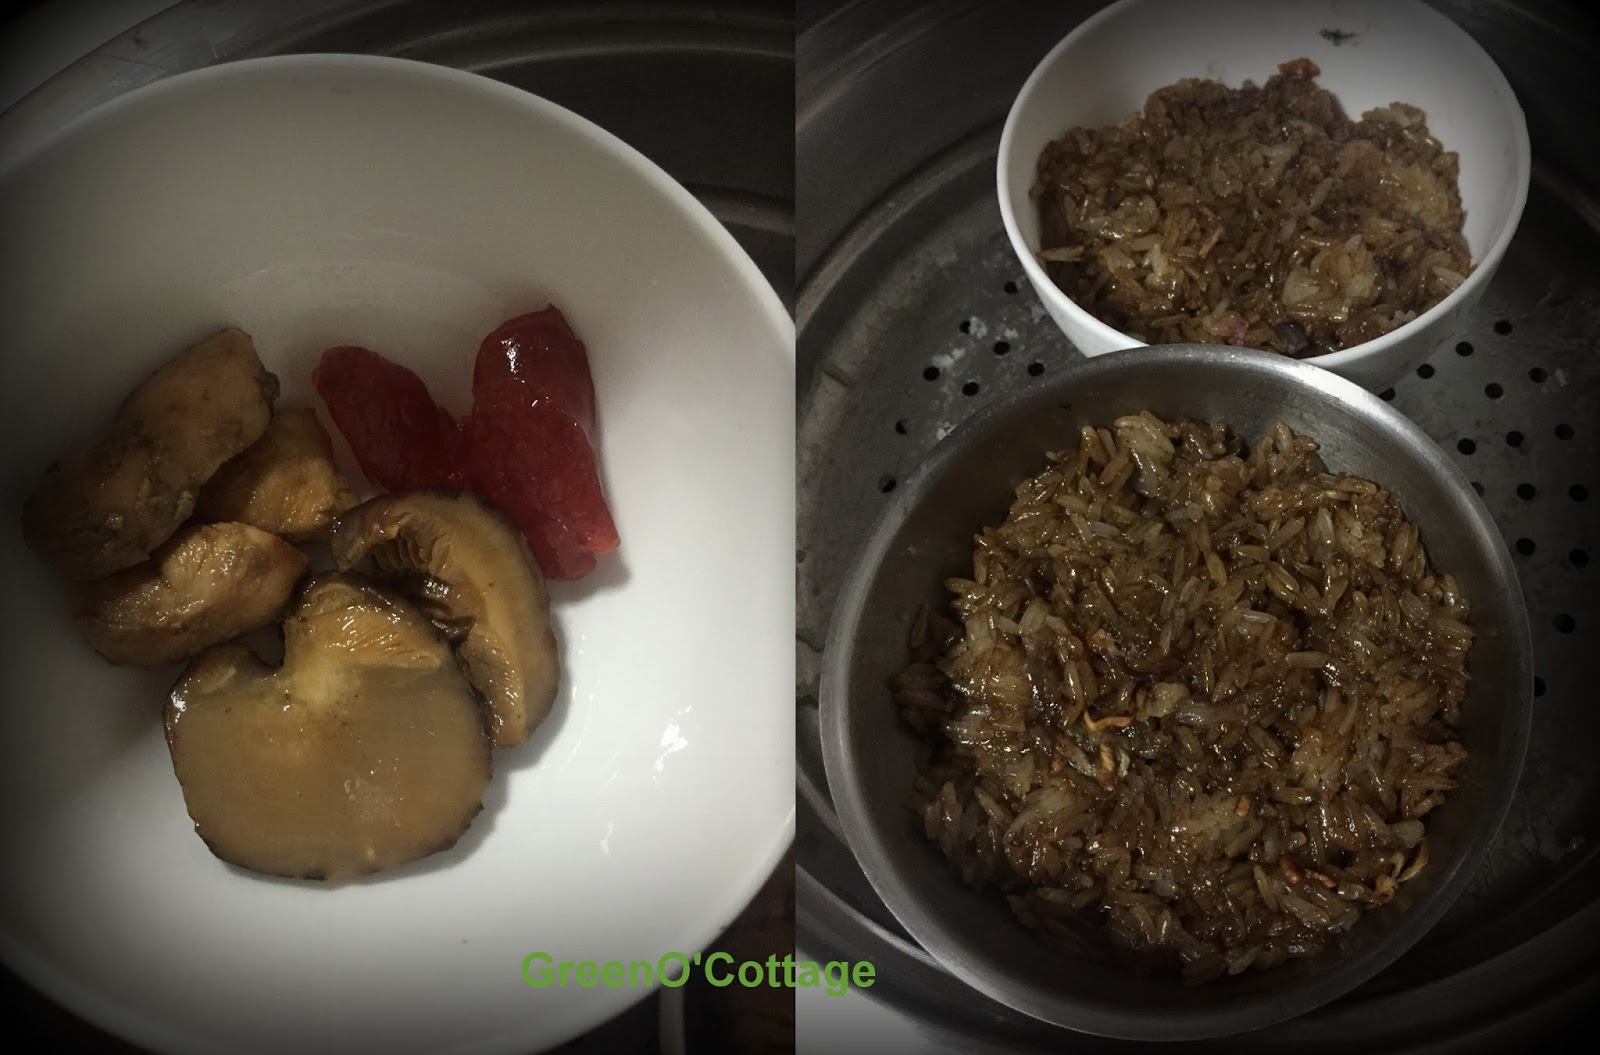
Lor Mai Kai, Steamed Glutinous Rice with Chicken Recipe (糯米鸡)

It is my one of my favorite DimSum dish. Whenever, we were having breakfast in a DimSum restaurant, it was always my dad's strategy to order this dish first; just to make sure our little stomachs get fill and no place for other dishes. When we grown up, we always use this as a joke even though we knew the reason behind...it is not cheap to eat in a DimSum restaurant especially you have 5 kids!

To make a delicious Lor Mai Kai, it is important to make sure that you use the drumstick as the meat is tender and the oil from the drumstick will moisten the rice. This same principle applies when we make 'bak zhang'. We always need to compensate between the 'healthy' recipe with the delicious dish.


Ingredients ( 4-6 bowls)
250 g glutinous rice
200 g boneless chicken thigh meat
3 pieces of mushrooms, soak and cut into 2-3 pieces
20 g of shallots, slice into thin pieces
1/4 bowl cooking oil
1/2 bowl of water
1/2 Chinese sausage
soya sauce

Marinate for chicken
2 tsp soy sauce
1 tsp sesame oil
1 tsp sugar
1 tbsp. Chinese wine (optional)

1. Soak rice overnight or a minimum of 4 hours. Marinate the chicken for at least an hour.

2. For the rice, pour away the water and steam it for about 40 minutes.

3. In the mean time, prepare the shallots. Fry the shallots until it is brownish. Remove the onion oil and fried shallots from the wok and set aside.

4. Using the same work, prepare the sausage. Heat up the work and add in a little of onion oil. Slightly fry the sausage until fragrant. Remove and set aside.

5. To prepare the mushroom, add in some onion oil and mushroom. Stir-fry for around 1 minute and add in some water, salt and sugar. Simmer for 5 minutes. Remove the mushroom and set aside. Leave the sauce in the wok.

5. Using the same sauce, stir-fry the chicken until semi-cooked.

6. After the rice is steamed for around 40 minutes, transfer the semi-cooked rice to the sauce in the wok. Gently stir and mix the rice. Add some soya sauce, wine and fried onion. Taste and adjust accordingly.


To prepare the dish for steaming

7. For each bowl, add a slice of sausage, piece of mushroom and chicken at the bottom.

8. Scoop in the rice and press firmly with a tablespoon to flatten it. Add in some chicken gravy to moisten the rice.

9. Steam the bowls for 20 minutes or longer dependent on the bowl size that you are using.

10. Use a tablespoon to gently dislodge the rice and present it inverted. Serve the Lor Mai Kai warm.


Chocolate Chip Muffin with Crumb Topping

For the last day of this school term, my son has requested me to make some muffins for his classmates and teachers. Since these muffins are for kids, I am planning to bake chocolate muffins for them. In order to make the muffins more presentable, I have searched some books for the crunch topping recipe.
I am so surprised that the kids love the muffins a lot and the teacher has written a "Thank You' note to me. I am so glad and this has motivated me even further. I will bake more of my new recipe for them to try!
Ingredients
Crumb topping (Crunch topping)
55 g pecans
34 g oat
56 g unsalted butter
57 g all-purpose flour
45 g granulated sugar
1/2 tsp ground cinnamon
1/8 tsp salt
1/8 tsp baking powder
1. Chop the pecans and oats to a coarse chop, either by hand or food processor.
2. Melt the butter and allow it to cool down. It is important to make sure that the melted butter to cool down before adding into the dry ingredient as it will melt the sugar.
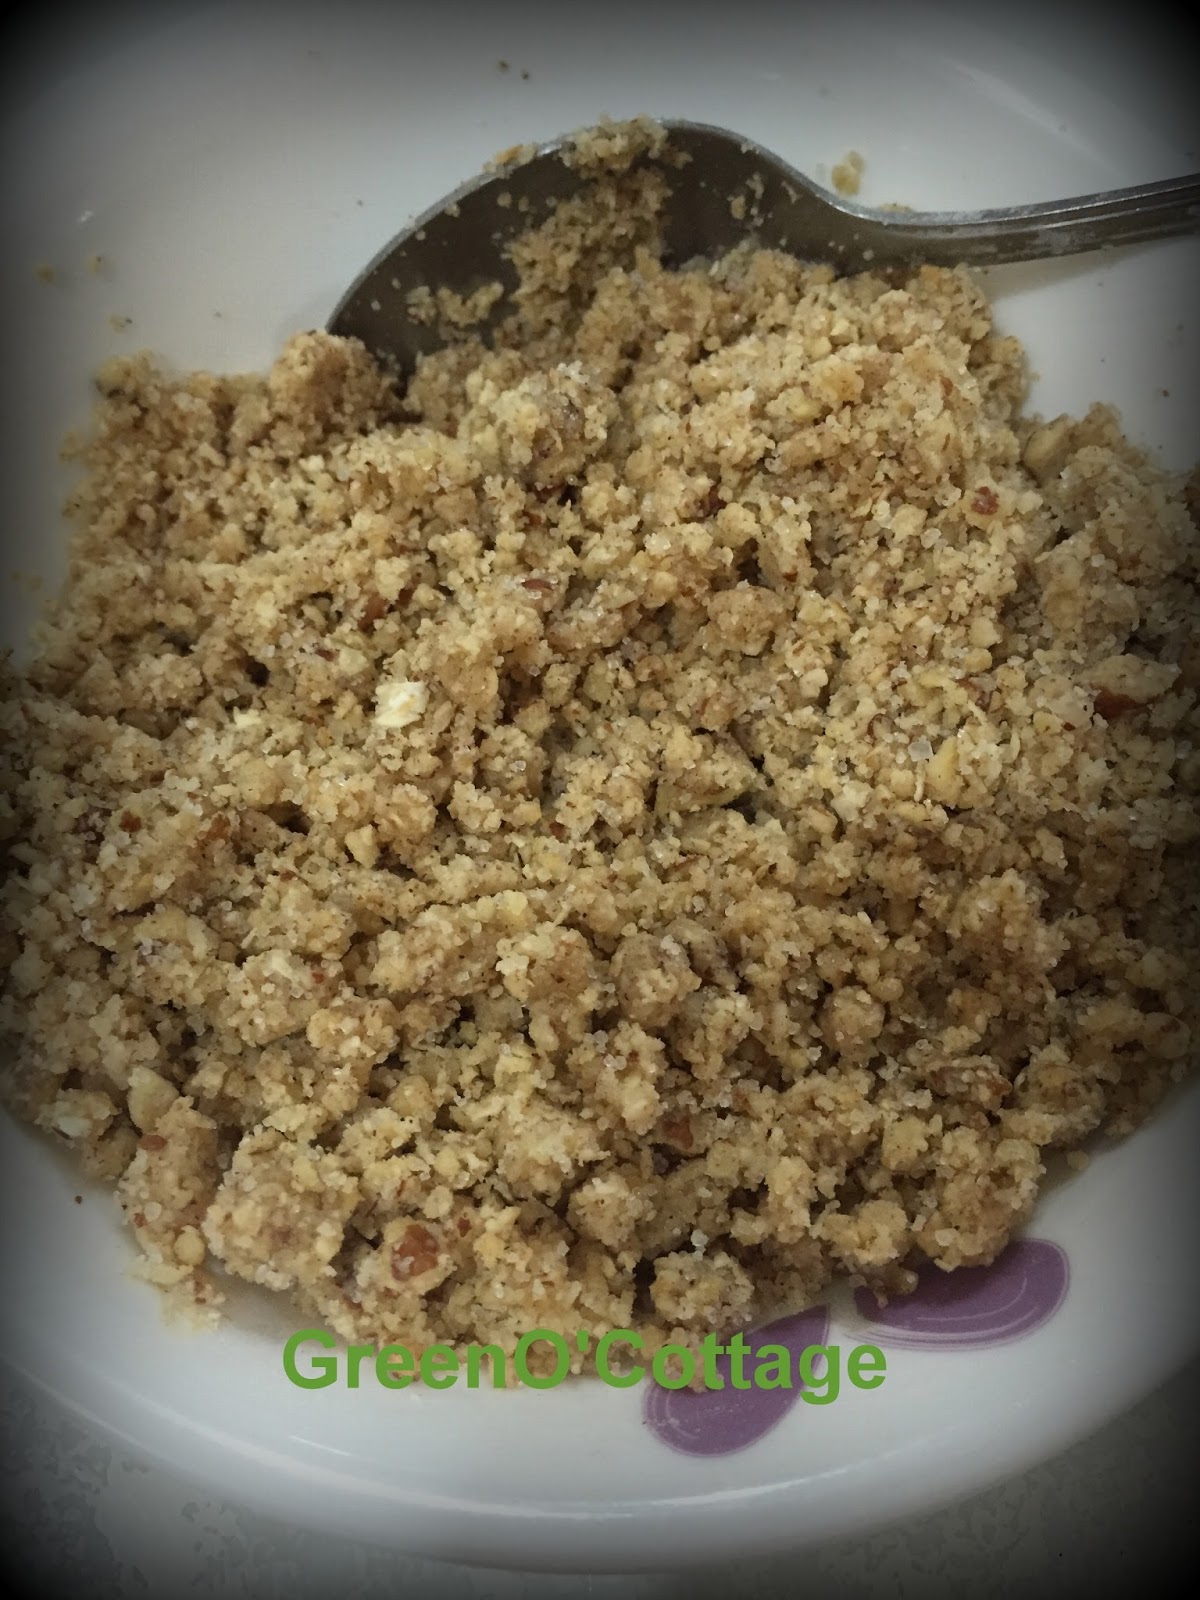
3. Combine all the ingredients together in a bowl and mix until a lumpy consistency is achieved.
4. Store in an airtight container for up to 1 week in the refrigerator.


Chocolate chip muffins (6 muffins)
130 g all-purpose flour
1 1/4 tsp baking powder
50 g granulated sugar
1/8 tsp salt
60 g unsalted butter
80 ml milk
1 egg
1 tsp vanilla essence
100 g chocolate chips
Crumb topping (optional)
5. Preheat oven to 180'C and bring egg, butter and milk to room temperature.
6. In a bowl, whisk together the eggs, milk, and vanilla essence.
7. In another large bowl, mix together the flour, sugar, baking powder and salt. (Optional: Prepare the Crumb Topping and set aside). Stir in the chocolate chips.
8. With a spatula, fold the wet ingredients, along with the melted butter, into the dry ingredients and stir only until the ingredients are moistened and combined. (Do not over mix or you will have tough muffins).
9. Fill prepared muffin tins two-thirds full with batter. Sprinkle Crumb Topping on top if desired.
10. Bake in the convection oven for 20 to 25 minutes, or until a cake tester comes out clean from the middle.
11. Transfer to a wire rack and let cool for about 5-10 minutes before removing from the pan.


Saturday, 4 April 2015

Dry Bak Kut Teh

With a slight spiciness and fragrant from the fried cuttlefish, this dish has become very popular. You can easily take up a few bowls of rice just the gravy of this dish. Unlike normal Bak Kut Teh soup where there is a strong taste of herb, dry Bak Kut Teh is much milder. 

You may adjust the spiciness by varying the amount of chili, and personally feels that higher level of chili will enhance the taste but you have to control if you cook for kids. In my recipe, I have added extra ladies finger since this is my kids' favorite.


Ingredients
1 kg prime ribs
1/2 pig stomach, optional
1 tbsp. light soya sauce
2 tbsp. oyster sauce (optional)
2 tbsp. dark soya sauce
1 big garlic, with skin
1 packet of 
1/2 packet of A1 Brand Bak Kut Teh herbs


5 cloves of garlic, smashed with skin intact
1 tbsp. brown sugar
5-8 pieces of dried chilies, cut into 5mm length
10 lady fingers, cut into slices
2-3 pieces of fried bean curd
10 g of dried cuttlefish strips
1 tbsp corn starch mixed with some water


To prepare the meat and stomach
1. Boil a lot of water to blanch the prime ribs for around 10-15 seconds until the exterior just turns pale. Drain and set aside.
2. For the stomach, you have to clean with lemon juice and salt both internal and external of the organ. Since the butcher has cleaned for me, it takes less effort for me to clean. Soak with lemon juice and salt for around 10 minutes and clean for at least 2 times or until there is no more smell. If the smell still persist, continue to clean. Rinse and set aside.
3. To a large pot, add in 1 liter of water. Once the water is boiling, add in Bak Kut Teh herbs, garlic, dark and light soya sauce. Turn the heat to medium low flame and let it boil for around 5 minutes before adding in the ribs and stomach. This is to allow the flavor of the herbs to infuse into the water. For the heat, it is always important to make sure that the water is bubbling so that the herbs can penetrate into the meat. With this, the meat will taste better.

4. The stomach normally  cooks faster than the ribs (normally 20-30 minutes). You may test the stomach readiness by using a chopstick. Once the chopstick can penetrate through the stomach's wall, the stomach is ready and can remove from the pot. Cut into 1 cm strips and set aside.

5. Continue for the ribs as ribs need more time to cook. Cooks for 40 minutes or until the ribs and stomach are soft. Remove from pot and set aside.


Final cooking
6. In a wok, add some oil, dried the dried cuttlefish strips until crispy. Remove and set aside.


7. Using the same wok, add in some oil, dried chilies and lady fingers.
8. Stir fry using high flame for around 30 second.
9. Add in all the ribs and stomach. Stir before adding in around 200 ml of Bak Kut Teh soup.
10. Stir the ingredient evenly and add in fried bean curd. Let the bean curd to absorb the sauce and soften. Finish up the dish by adding in the cuttlefish. Stir and thicken the sauce by using corn starch water.


Thursday, 2 April 2015

Bak Kut Teh - Chinese Herbal Broth with Pork Ribs 肉骨茶

On the way back from my Vietnam trip, I was attracted by the Bak Kut Teh dish in a magazine and since then, I  have been craving it a lot. At first, I thought of cooking this dish from scratch and after searching through the website, I gave up and turn back using the commercial A1 Bak Kut Teh. This is because I could not wait anymore!!!!

Bak Kut Teh or literally 'meat bone tea' is a very famous Chinese Malaysian dish and is a must-try for tourists and also a much-loved dish by the locals. Bak Kut Teh is essentially pork ribs cooked in a rich, savoury and fragrant herbal broth - it can be as simple as just the ribs in the broth/ soup or made more balanced with the addition of dried tofu, mushrooms and some vegetables of your choice. The main dish with the ribs and soup are usually served with Chinese doughnuts (you tiao) and rice. Normally, we will have this dish with Chinese Tea as we believe that the Chinese Tea will 'wash' away all the oil.

Since we are having pot luck party tonight, I am taking this opportunity to prepare Dry Bak Kut Teh for the guest. So, my family will have Bak Kut Teh soup for lunch and dry version for the dinner.

Ingredients:
1.5kg prime ribs (肋排)
1 pork stomach (猪肚), optional
6-8 pieces of Chinese mushroom, soaked until soft and cut half
25g of Yu Zhu (玉竹)(Solomon's Seal Rhizome), optional
1 packet of ready packed Bak Kut Teh herbs, (Brand A1)
1 tsp of peppercorn, crushed
2-3 whole garlics, with skin intact
2 liter of water
5-6 pcs of fried bean curd skin, cut into shorter strips

Seasoning
2 tbsp. of dark soya sauce
2 tbsp. of oyster sauce
4 tbsp. of light soya sauce
pinch of salt


Others
Cooked rice (Add some fried shallots into rice cooker and cook rice as usual)
Chopped red chilli and garlic with light soya sauce as a dip
2-3 deep fried 油条 youtiao aka chinese dough fritters
Coriander, garnishing


1. Boil a lot of water to blanch the prime ribs for around 10-15 seconds until the exterior just turns pale. Drain and set aside.

2. For the stomach, you have to clean with lemon and salt both internal and external of the organ. Since the butcher has cleaned for me, it takes less effort for me to clean. Soak with lemon juice and salt for around 10 minutes and clean for at least 2 times or until no more smell. If the smell still persist, continue to clean. Rinse and set aside.

3. Rinse Yu Zhu and crush peppercorn. Set aside.

4. To a large pot, add in 2 liter of water. Once it is boiling, add in Bak Kut Teh packet herbs, YuZhu and peppercorn. Add in dark and light soya sauce. Turn the heat to medium low flame and let it boil for around 5 minutes before adding in the ribs. This is to allow the flavor of the herbs to infuse into the water.

5. Add in garlic, mushroom, ribs and stomach. Bring to boil again before lower to medium low flame. The heat control is very important. It is always important to make sure that the water is bubbling so that the herbs can penetrate into the meat. With this, the meat will taste better.

6. The stomach normally cooks faster than the ribs (normally 20-30 minutes). You may test the stomach readiness by using a chopstick. Once the chopstick can easily penetrate through the stomach's wall, the stomach is ready and can remove from the pot. Cut into 1 cm strips.


7. Depending on your preference, you may start to test the ribs softness from 40 minutes onwards. My family prefer a tender and softer texture, thus I will normally cook for at least 50-60 minutes. Season with oyster sauce and salt. Add in the fried bean curd skin. Off the heat once it is done.

8. Ladle some soup into a smaller small pot to cook beancurd puff. Cook for around 5-10 minutes until they are soft. Do not cook beancurd puff directly into the big pot as the beancurd flavor will overtake the whole Bak Kut Teh flavor.  


9. Serve Bak Kut Teh with chunks of you tiao, chopped chili and cooked rice.


Thursday, 12 February 2015

Sarawak Laksa

My family fall in love with this noodle on the first try. It was prepared from my neighbor and after that, she has been giving me a lot of advices on how to make a good Laksa. She has advised me to use the commercial Laksa paste in order to master my cooking before considering making the paste from scratch.

This is my 4th attempt and I would say, it is time for me to go to the next level; making the paste from scratch.... I do hope this plan will come true one day :)

But before that, it is good if I share some tips on how to make a good Laksa noodle using commercial Laksa paste. I am really lucky to have a neighbor who always bring back the Laksa paste to me and also taught me how to prepare this noodle. She has been selling Sarawak Laksa for more than 10 years.

There are few tips in order to make the noodle tastes good. As for the ingredient, besides using fresh coconut milk, adding a few drops of fish sauce can improve the soup's flavour. Since we are using beehoon as the noodle, it is the best if we blanch the beehoon with the soup base so that the soup flavor can be absorbed into the beehoon.

You may choose any garnishing that you like. Since my husband loves roast pork, I have added in just to match his liking! Therefore, you may find that this may not look like the original of the Sarawak Laksa!


Ingredients (8-10 people)

600g commercial Laksa Paste
1500 ml of water
700-1000 ml of coconut juice (depending on the individual preference)
A few drop of fish sauce
Salt to taste

Garnish
1 kg of prawns, clean and deveined
1 chicken breast
5 eggs
600g of roast pork
Some mint leaves
Some limes
300 g of bean sprout
1 packet of beehoon, soaked with water
1 kg of yellow noodle

1. Boil water and cook the prawns and chicken breast. Soak the prawns and chicken breast in cold water upon cook. This step will prevent the prawns and chicken breast from further cook while maintain the juiciness in the meat.


2. Using the same boil water, add in the commercial Laksa Paste and boil for another 30 minutes. This is to make sure that all the aroma and flavour from the Laksa Paste diffuse into the water.
3. After 30 minutes, sieve out the spices traces. Then, add in coconut juice into the soup (without any spices traces) and the added amount is depending on the individual preference. Since I prefer a watery soup, I am using only 700 ml of coconut juice. If may add more if you prefer a thicker soup. Add in a few drop of fish sauce to taste.


4. Garnishing: Peel the chicken breast into thin strips. Cut the roast pork into small slices.


5. As for the eggs, beat the eggs lightly with a fork. Add some salt and pepper. During frying, coat a thin layer (~2-3mm) of egg layer on a pan. Once it is cooked, remove from the pan and set aside. Continue with the remainder egg mixture and depending on the size of the pan, you may get 3-5 pieces of thin layer of egg. Once the egg layers are cool, cut into small slices.

6. Bean sprout and yellow noodle: Boil a pot of water and blanch the bean sprout and noodle separately. The main objective of blanching the yellow noodle is to remove the excessive oil and it should be done within 1-2 seconds. Do not cook the yellow noodle.


7. Noodle: Using a clean pot, transfer around 250 ml of curry soup base into it. Once the soup base is boiling, add a small handful of beehoon and yellow noodle (from step 6). Cook until the noodle are cooked. Serve and garnish the noodle in a bowl. You may serve with Belacan Dipping Sauce for better taste.


Yummy.....let's feast!


Sunday, 8 February 2015

Melt-In-Mouth Pineapple Cookies

I have just finished my Spring Cleaning for the Chinese New Year also known as Spring Festival. This is the culture for Chinese to clean their house before Chinese New Year which we believe this will sweep away all the bad luck. Every nook and cranny of the home is scrubbed, broken furniture and appliances discarded, and dirt is swept away to unsure Chinese New Year starts off right. This is a big day where I can still recall my grandmother will choose an auspicious date to start off the job. In fact, we were using bamboo leaves to clean the house in order to sweep away the 'dirty unknown' stuff!!! As comparing with my grandma's practice, my Spring Cleaning is far less complicated.

Back to my pineapple cookies. As usual, my son is the one who initiated so that we can have some festive mood. After some discussion, he suggested to bake cookies and among the cookies, he has chosen Pineapple Cookies!! That is really a time consuming task!!! I have no choice but to fulfill his wish.

He has helping me with some blending job and rolling up the pastry. So far, I have made 2 batches and the batches are different in term of the used of sugar for the filling and the type of oil for the pastry.

For the 1st batch, I have used 20 g of brown sugar. To be honest, the brown sugar flavor covers by the pineapple taste and it does not help much in improving the tart's fragrance. As for the 2nd batch pastry, I have replaced around 30 g of butter with vegetable shortening. It turns out to be softer and creamier. Thus, in future, I shall use the pastry recipe of the second batch.

Another trick that I observe is the sweetness of the pineapple filling. In my normal baking, I will reduce more than half of the sugar amount. However, for the pineapple filling, it is not advisable as this will yield sour filling. You may keep on tasting the filling while you cook in order to get the right amount of sourness.

As for the glazing, the outcome will be more presentable if we only glaze after we bake the cookies. I did it for my second batch and the color turns out to be so beautiful and I do not have to worry about over bake the cookies.

Ingredients
Pineapple Filling (yield around 350-400 g)
2 large pineapple, remove skin
200 g sugar (you may adjust according)
3 cloves

1. Blend all the pineapple using a blender or processor.
2. Use medium heat, cook the blended pineapple with cloves until it forms a thick paste; like oatmeal thickness.
3. Add in sugar. Upon adding in sugar, the paste will be slightly watery again. Do not worry and continue to cook until you get the color and paste consistency that you want.

Blended pineapple


Pineapple Filling


Pastry
280 g plain flour
20 g custard flour
40 g corn flour
30 g milk powder
40 g icing sugar
150 g salted butter
30 g vegetable shortening
3 lightly beaten egg yolks
1 tsp vanilla essence
2tbsp Parmesan cheese

Egg wash (egg yolk and 1tsp of milk)

1. Sift plain flour, custard flour, corn flour, milk powder and icing sugar together.


2. Cut the salted butter into cubes and mix with the flour. Mix well either with finger tips or a mixer.
3. Once they are well blended, add in the yolks and vanilla essence.
4. Knead well with hand and chill in the fridge for 1 hour to firm up the dough for the ease of handling.


5. While waiting for the pastry to chill, roll up around 7 g of pineapple filling. Set aside.
6. As for the pastry, rolls up around 9 g of pastry. Then, carefully warp the pineapple filling inside the pastry and roll in a ball.
7. Bake in a preheated oven at 170'C for 15-20 minutes. Remove from the oven and glaze with egg wash.

Before oven


Friday, 9 January 2015

Vegetarian Korean Japchae (Vegetarian Korean Stir Fry Sweet Potato Noodle)

This is a modified version of Japchae recipe that suits with Chinese flavor. In this recipe, I am using translucent Korean sweet potato noodles, also known as starch noodles or Korean vermicelli, are made from sweet potato starch and water. When cooked, these dried gray noodles turn clear. The noodles are stretchy, slightly chewy and springy in texture. 

The tips to this recipe is cooking each ingredient separately before mixing them together. 

NOTE: If you wish to have meat, slice the meat thinly and cooked it separately before mixed with the noodles. You may just season the meat with salt and pepper.

Ingredients:
250 g Korea sweet potato noodles
10 pcs mushroom, soaked and cut into thin slices
100 g cabbage, cut into small pieces
1/2 small carrot, cut into thin slices
1 paprika, cut into thin slices
3 eggs, lightly beat season with salt and pepper
2 tps sesame oil
salt, pepper and soya sauce, to taste


1. Bring a large saucepan of salted water to boil over high heat. Add the noodles, stir to separate them, and boil until cooked through, about 5 minutes. Drain in a colander and rinse under cold water until cool. Using scissors, cut the noodles into 6 to 9 inches length (optional). With the noodles still in the colander,drizzle with 2 tsp of the sesame oil and toss to coat. Set aside.


2. Heat the oil in a large frying pan over medium heat until shimmering. Add in eggs and move the pan around to spread them out evenly. Remove eggs from the pan once it is cooked. Set aside.

3. Heat the oil in a frying pan. Add the carrots, stir-fry until it is cooked. Season with pepper and salt. Set aside. Use the method to stir-fry mushroom, paprika, and cabbage separately. Set aside.


4. In a clean pan, mix the glass noodle, mushroom, carrot, paprika and egg together. Stir-fry the glass noodles mixture using medium heat for 3 minute or until the noodle is warm. Stir frequently so the noodles does not stick to the bottom. Add a little of oil and soya sauce if necessary.

5. Serve the glass noodles in a bowl. Enjoy!


Wednesday, 3 December 2014

Soft and fluffy Pumpkin Chiffon Cake

I was so shocked when I saw plenty of pumpkin in the supermarket and it reminded me of Halloween festival. My family does not celebrate Halloween; in fact my son always complaining of having nightmare around this season. I think it is due to his illusion from the scary advertisements. Anyway, since there are so many pumpkin, I have the urge of baking Pumpkin Chiffon. Unlike other cake, Chiffon cake is light in texture and can be prepared in a short time without much hassle.

Before preparing the baking ingredient, it is important to prepare the pumpkin in advance in order to make sure that the pumpkin puree is cool down before blending with other baking ingredient. As I shared in my other Chiffon cake post, the secret of having a fluffy texture for this cake is to have a perfect stiff egg white. Without a perfect stiff egg white, you will never get the soft texture of Chiffon Cake. The eggs need to be at room temperature so they will reach their full volume when beaten. Always use fresh egg as it is much easier to beat. Adding a little cream of tartar helps with it. although you can leave it out. Cream of tartar is used to give stiffness to the egg whites, so that the cake will not collapse easily. Not to forget to use a very clean mixing bowl to ensure egg whites can be whisked up easily until very stiff.

It is important that the batter is baked in an ungreased tube pan which allows the batter to cling to the sides of the pan as it bakes. The tube in the center of the pan lets the hot air circulate so the heat can reach the center of the bake and not over bake the cake. The cake needs to be turned upside down immediately upon removing it from the oven as this keeps from shrinking and losing its volume.

Hope the above tips, you will be able to bake a soft and fluffy Pumpkin Cake!

Ingredients
Egg Yolk Batter
80 g cake flour
70 g pumpkin puree
1 tsp baking powder (optional)
30 g castor sugar
5 medium egg yolk
1/4 tsp salt
80 ml milk/ coconut milk
40 g oil

Ingredient B
5 medium egg white
1/2 tsp cream of tartar (optional)
40 g castor sugar


1. Preheat the oven to 175'C and have ready a 22cm ungreased chiffon cake tin.

2. Sieve cake flour and baking powder together. Put aside.

3. To make the egg yolk batter, whisk egg yolks and castor sugar together until the batter is pale yellow. Combine with salt, oil and milk together. Stir in one direction until smooth and well-combined. Fold in flour until forms a smooth batter.

4. You may filter the batter to remove the lumps.


5. In another bowl, put in egg whites and cream of tartar into a clean mixing bowl. Use high speed to whisk until frothy. Add in sugar slowly. Continue to whisk until stiff but not dry. (Please refer to the video "How to whip egg white")

6. Once the egg whites are ready, gently fold in the stiff egg whites (in three additions) to the cake batter. (Please refer to the video "How to fold in egg white")


7.Pour the batter into a 22cm ungreased chiffon cake pan and bake at 175'C for about 10 minutes and then 165'C for around 30 minutes. You may test the cake readiness using the toothpick method.


8. Remove from oven, invert (turn upside down) and leave to cool completely before removing cake from the tin.


Wednesday, 26 November 2014

Sambal Fish

Holiday....I really need a break. I have been so busy with my son's examination that I have no time to update my blog. My daily activities were just 'studying' and nagging! Really a tough job especially to control another person. After two months of stress, finally, I can start to write again. I do hope when my kids read these posts in future, they can recall the way I used to nag them.
 
Sambal Fish is one my of favourite childhood dish. I can easier finished up 2 stuffed fish whenever it was served with warm rice. The rice has to be warm or hot rice so that you can get the 'high' sensation.....hot from the rice and chili!
 
In this recipe, I have added kaffir lime leaves in order to give some Thai flavor. The secret of having a good sambal besides the spiciness is the sweetness and sourness. Another secret of having a good chili paste stuffing is to precook the chili paste before stuffing it into the fish as the aroma of the chili paste is stronger after cooking. With this additional step, you can use less oil when frying the fish.
 
Whenever my mom prepares this dish, she will use Hardtail Mackerel fish but today, I have to use snapper as there is no mackerel in the market. To my surprise, snapper turns out to be a better fish as its flesh is so smooth.


Ingredients

9 pieces of shallots
2 cloves of garlic
6 pieces of chilies
3 pieces of Bird's eye chilies (cili padi)
3-4 pieces of Kaffir lime leaves
3 pieces of lemon grass (use only the white portion)
1 tsp of belacan powder
1/2 cup of oil
salt and brown sugar to taste
2-3 tbsp tamarind juice (dissolve 10 g of assam pulp in 4 tbsp of water, liquid strained)

2 snappers (make a deep slit at the back of the fish to create a pocket)


1. Blend all the ingredients together until fine. Blend together with oil in order to achieve a fine texture.


2. Pour all the chili paste on a pan. Then, use medium heat to heat up the pan slowly fry the chili paste till the oil reappear. Taste with sugar, salt and tamarind juice. Let it cool down before stuffing into the fish.


3. Then, heat up some oil in a non-stick pan and then fry the fish using medium heat. Dish up once the fish are done. Serve with some lime and Belacan Dipping Sauce.


Friday, 24 October 2014

Mooncake-Taro/Yam Flaky Mooncake (芋頭酥)

It is all started from my friend who encouraging me to make mooncake this year. I do not have the 'push factor' until the eve of Mid Autum Festival after trying her snowskin mooncake. Since this is my first attempt, I have chosen an easier version for myself.....Yam Flaky Mooncake. The yam filling is easier to prepare than the lotus paste although there is a slight challenging in rolling out the skin. It takes time to be master. It takes me two days to master with the rolling. That is the reason, the actual quantity of my finished product (mooncake) turns out to be lesser as the filling was the balance from the earlier day.

The skin of this mooncake requires two different dough: Oil dough and Water dough. You may use butter as the leavening agent but the strong flavor of butter will eventually cover the yam's flavor. I would recommend to use vegetable oil for mooncake since we want to really enjoy the flavor of the filling.

For the filling, I used the ratio of 1:5 of oil to yam and I noticed that it is too dry. In my next trial, I am planning to increase the quantity of oil in order to improve the wetness of the filling. Smoothness is an important factor in the mooncake filling. Insufficient oil, the filling will look a bit dry. That is the reason I do not even dare to let my dad to try this batch of mooncake due to the dryness of the filling.

Some recipe calls for color. Since I am always using natural color, I am using beetroot this time as it is the only color I have in my fridge. That is the reason my mooncake does not look like the traditional mooncake color. For other color preparation, please refer to my blog on "Natural Food Coloring".


Yam Filling (20-24pcs)
500 g of yam filling
100 g of castor sugar
100 g of vegetable oil (you may use shallot oil for more fragrance)
A pinch of salt
30 g of wheat starch

Oil Dough
200 g of all purpose flour
90 g vegetable oil

Water Dough
230 g of all purpose flour
80 g water and coloring (beetroot)
80 g vegetable oil
30 g castor sugar
1/2 tsp vinegar

1. Yam filling: Cut the yam into slices and then steam using medium heat until the yam is soft. Immediately, transfer the yam into a food processor and blend with oil, sugar, salt and wheat starch. Set aside and let the filling cool down. Weighing out the filling at 35 g each.


2. To prepare the oil dough, mix flour and oil well. Knead for a while and let it rest for 30 minutes. Similar method is applied on the water dough except, you need to spend around 3-5 minutes in kneading the water dough in order to form a soft dough. Let water dough to site for 30 minutes as well.


3. After 30 minutes, divide the dough evenly by dividing each the weight of water dough and oil dough with 10 pcs.  Roll them in a ball.

4. Assembly: It is important to pay some attention on the rolling. Here is a good link of video showing how to roll the skin. Video of making Flaky Mooncake by KiwiSite


5. Preheat oven at 175'C and bake the mooncake for around 20-25 minutes.


Tuesday, 23 September 2014

Natural Color Rainbow Cake

Finally, it comes to the eve of my son's birthday (9 Years Old). Tonight, I have to bake at least 6 layers of butter cake with different color. Why at least 6 layers? It is because I might fail in the first attempt and need to re-bake it. Anyway, it is a really an exciting night for me. 

For the coloring, I opt for natural color. As a health conscious person, I am really worried on the chemical in the food coloring. With mentally and physically prepared, I am planning to use natural color for this cake. I think it is really important to get yourself physically prepared as you need to do a lot of cleaning and cooking in order to get the different color. Why mentally? It is because the color that you want to achieve may not be as nice as the artificial coloring. The color may not be as intense or as sharp as you thought.

You may refer to my website on the preparation of "Natural Food Coloring". Although it is tiring, I would say it is worth to spend some time as you do not have to worry on the chemical in the food coloring. Trust me....healthy is the most important. Do not think of tiredness...just take it as an enjoyment to prepare healthy food for the family.

Having said that, I do really feel proud of myself for spending so much time and effort in preparing the natural color for this cake. At the end of the day, you will feel the satisfaction when you see your kids enjoying the cake that is safe with natural color. No preservatives and no artificial coloring  :)


Ingredients for 1 layer of 8" round cake
100 g cake flour
60 g sugar
1 tsp baking powder
90 g butter
20 ml (milk and coloring)
3 small eggs
(NOTE: For the green color cake, you may add in 1 tsp of green tea. Other ingredient remain the same)

1. Preheat oven at 170'C.

2. Whisk butter and sugar until fluffy. Then, slowly blend in the eggs, milk and coloring while folding in the flour until everything is blended well.

3. Pour into a baking pan. Layer the batter well and bake for around 5-10 minutes. (Make sure that you had layered a piece of wax paper onto the bottom of baking pan)

4. Cool down the cakes, and put into fridge for at least 2 hours or overnight. This step is to ensure that the cake layers are harden and much easier to handle during assembly steps.


I have forgotten to take 2 batches of color....maybe I am too rushing  :)


Assembly the cake

This is the most important stage. We do not want to have a topple or uneven cake. I am using butter cream for my layering icing because it gives a stronger holding power as compare to whip cream. As a beginner, I always go for a safer approach. If you are a beginner, please watch the video on How to Decorate with Buttercream before started on the assembly steps. 


Butter cream
240 g butter
600 g icing powder
4 tsp vanilla essence
120 ml milk (or less, depending on the butter cream consistency)


Layering a thin layer of butter cream in between each layer of butter cake 

1. Butter cream acts as the 'glue' for the layering. Thus, before starting any layering, apply some butter cream on the cake board. Then, put on the first layer which is red onto the board. Make sure the cake layer sticks well on the board.

2. Then, starts applying a thin layer of butter cream on top of that red layer. Thickness should be around 2-3 mm as you do not want the cake to be so creamy. Do not worry of the appearance. 

3. After the butter cream is evenly spread onto the red layer, put orange layer on the top. Apply butter cream and repeat the same steps for other layers. 

4. Please remember to follow the RAINBOW COLOUR arrangement: RED, ORANGE, YELLOW, GREEN, BLUE, VIOLET

5. With the remainder of the butter cream, you may use to layer the side of the cakes to make sure that the gap is filled. 

6. Transfer the cake into the freezer to harden the cake again before frosting.


Frosting the cake: Cream Cheese frosting
225 g Cream Cheese
60 g butter
1 tsp vanilla essence
150 g icing sugar
NOTE: You may need to adjust the sugar according to the frosting consistency at room temperature. If the weather is warm, you need less of the icing sugar as cream cheese is softer. I have accidentally using 200 g and it is actually flowing down (eye tears) when I used it for my frosting.


Colorful layers....the color is not as attractive compare with 'food coloring'


Saturday, 20 September 2014

Natural Food Coloring

Coloring is an important ingredient in any baking. We want our cake to look attractive, thus coloring is important to achieve that outcome. There are a lot of negative comments on the food coloring and this makes me quite worrying whenever I am using food coloring. Due to my laziness, I always find an excuse to go for food coloring.

Everything changes today. I want to go for Natural Color from now on. We have been eating a lot of unhealthy food and I do not want my home becomes another unhealthy place. Everything comes in 'yin and yang'. If too much 'negative' food, at home always have to provide 'positive' food to balance up the life. This is just my thoughts. Maybe it is not correct  :)

Here are the colors that I would like to prepare:

Violet: Blueberry
Blue: Purple cabbage
Green: Green Tea
Yellow: Saffron
Orange: Carrot
Red: Beetroot


Since I am going for natural color, I always prepare the color a few days in advance. I froze the color in the freezer and defroze them by locate them in the vegetable compartment for a few hours before use them to bake any cake.


Here is the preparation of the colors:

1. Red: 1 medium Beetroot 
Beetroot is the best coloring due to its intense color. The color is so dark and you do not need to use a large quantity of it. The juice of the beetroot can be easily extracted using a juicer.  Then, transfer the juice into a pot and cook over a medium heat until it is thicken up.


2. Orange: 3 medium Carrots
Juice out the pure carrot juice using a juicer. Then, transfer the juice into a pot and cook over a medium heat until it is thicken up. The color looks a bit darker.


3. Yellow: 1 tbsp Saffron
Transfer Saffron into 2 tbsp of hot water. Let it sit for half an hour until the color is extracted out.


4. Blue: 1/2 medium purple cabbage  
Boil 100 ml of water. Put in the cabbage and let it boil until the cabbage leaves are soften or for around 10-15 minutes. Strain out the cabbage, reduce the liquid until it is thicken. Add just the tiniest pinch of baking powder (you really have to go slowly here or you can turn the whole batch green). Keep adding baking soda in small amounts until the color just turns blue. Remember,  the color of blue can still change. If you add it to an acidic food, it will go right back to purple.

I was accidentally added too much of baking soda and the color turns out to be slightly greenish


5. Violet: 100g of blueberries
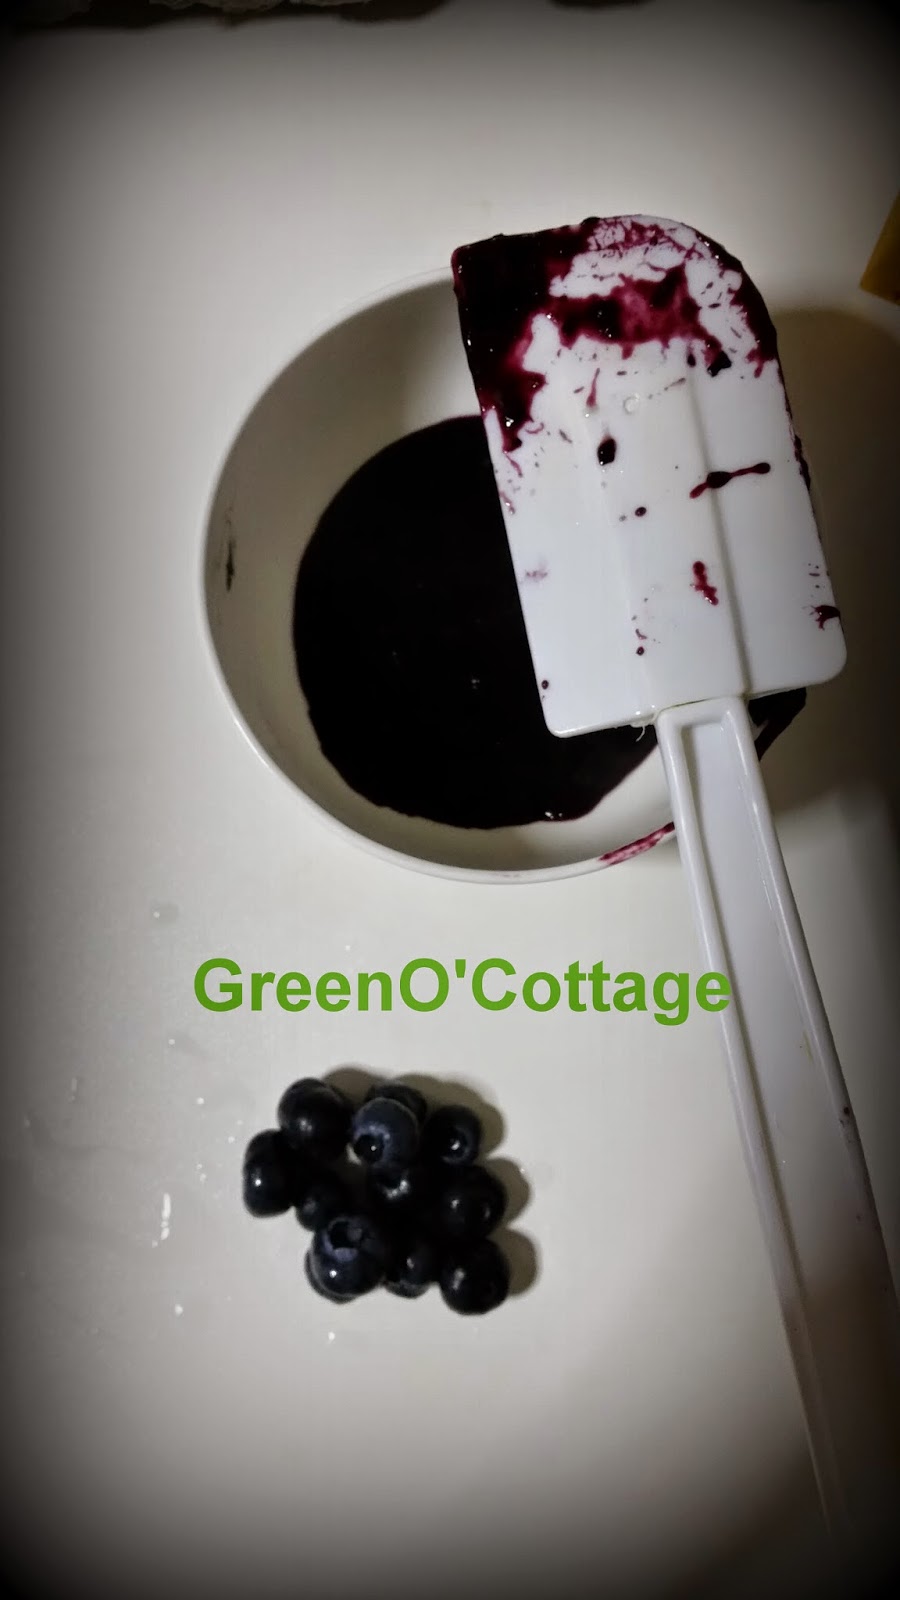
Wash and blend all the blueberries in a blender. Then, transfer the juice into a pot and cook over a medium heat until it is thicken up.