Friday, 11 April 2014

Ipoh Shredded Chicken Rice Noodles (Kai See Hor Fun) 怡保鸡丝河粉 (Version 1)

Weekend is finally here!! I really love weekend as this is the time I can explore a new recipe and let my family try on my new 'creation'! This week, I am planning to cook..... Ipoh Shredded Chicken Rice Noodles.

I am really excited as this is my first attempt of cooking this dish. I have been doing some research on this dish and I would say, the most challenging part is to get a nice chicken stock. Fresh ingredients is essential. Other than chicken,  prawn shells are also needed in preparing the soup. The soup is normally served with hor fun, along the shredded chicken, slices of prawn, chives and bean sprouts. You may include some fish balls for the kids.

My first attempt turns out to be very good. My family loves it a lot....... and it makes my day!!!!!

Ingredients
(Serving of 4-6 persons)

For the broth
1 medium chicken
500 g of prawns, washed and deveined (reserved the prawn shells)
5 leaves of Chinese cabbage (optional)
Rock sugar (about 5 pieces or to taste)
Salt to taste
2 tbsp of oil

Garnishing
Chives
Fried onions (shallots)
Bean sprouts
Shredded chicken

Making the broth
1. Heat up 3 liter of water. When the water boils, soak the chicken in the water. Lower the heat and let it cook until it is done. It takes around 40-50 minutes. Upon cooked, immediately transfer the chicken to a pot of cold water and let it soak for at least 10 minutes. This step is important to make the meat juicy and tender. Then, remove the flesh from the bone. Put the bones back to the chicken stock. Reserve the chicken meat; shredded before serving the meat.

2. Heat up a pan. Stir fry the prawns shells for around a minute or until they turn to golden colour. Then, transfer to the chicken stock (step 1). Normally, I will use some water to raise the pan to make sure that all the prawn's juice that are stick on the pan is being transferred to the chicken stock (with bones). Simmer for an hour or longer until you see a layer of red oil on top of the stock.


3. Strain the stock. Taste with sugar and salt. You may use chicken stock concentration to enhance the taste (optional).


Garnishing
4. Shredded the chicken meat and set aside.

5. Blanched the prawn meat in the soup, removed.

6. Cut chives into 1 inch strips. Blanch


Noodles
7. Blanched a serving of hor fun and bean sprouts in a pot of boiling water for around 5-10 seconds. Put into a bowl. Add some prawns, shredded chicken and chives. Then, add in the boiling broth. Before serving, garnish with fried shallots.


Tuesday, 8 April 2014

Low Calories Blueberry Cheese Cupcake

Today I am really craving of Cheesecake! I kept on thinking of the creamy cheesecake texture melted over my throat.

With the limitation of time and ingredients, I came out with this recipe. We only use around 45 minutes from weighing the ingredients to fully bake the cheese cake! That is really amazing, isn't it?

Since this recipe is so simple, I have offered my kids to do some mixing steps and baking for me. I am doing the cleaning and scooping the cheese mixture into the cake mold. My son is helping me in preparing the base and cream mixture while my girl is performing the most important task .....ON and OFF the mixer!

In this recipe, I am using low fat cheese cake so that it will lower some of the calories  :)
The most important step of making this cake is having a smooth cheese mixture. Thus, the mixing process is really important here. Other than mixing, there is no other challenge in baking this cake. It is a real cake for beginners... you can image, even my kids can make this cake!

This cake is really yummy and my kids really love it!!!

Ingredients
250g low fat cream cheese (Philadelphia low fat cream cheese)
5 tbps of caster sugar
140g low fat yogurt
1 egg
50g fresh blueberry

90g digestive biscuit (or any high fiber cookies)
1 tbsp melted low fat margarine/butter


1. Preheated oven to 160'C.

2. Use a roller to roll over the digestive biscuit until fine. Use a spoon to mix digestive biscuit and melted margarine well. Pour into paper cups. Press flat by using spoon.


3. Mix cream cheese and caster sugar at medium speed for about 3 minutes until fluffy. Stir in egg until it is well mixed. Lastly, add in yogurt and blended well.

4. Add in blueberries and combined with the mixture with a spoon. 


5. Pour./Scoop cheese mixture into paper cup with 3/4 full using a spoon. 

6. Bake in preheated oven over hot water bath for 30-35 minutes. Cool them down before store in refrigerator for about 4 hours before serve.


In

Friday, 28 March 2014

Ham and Cheese Bun (TangZhong method)

Ever since my husband bought me a new toy, Kenwood Mixer, I starts to bake. Baking becomes less hectic now especially in bread making and whipping egg white. To make this investment worthy, I will try my best to bake every week. Hopefully, this resolution will last forever  :)

Using Tangzhong method again, I am trying to use my new toy to knead my bread. After doing a lot of research in the library as well as via youtube, I gain some theoretical knowledge. Now, I have to get ready for the actual hand-on experience..... it is normally took longer time to be the expert. I am really excited.

In order to avoid any disturbance from my kids as well as to give them a surprise breakfast, I have to sacrifice and plan to wake up 4.30am. My mom always said that I am a bit obsessed and that is the reason, I feel much more tired during weekend as compare with weekdays. As an early bird, I am still feel alright to wake up early.

The bread turns out to be extremely good! My family enjoy the bread so much. All my effort is worth to see how they enjoy the buns. I begin to fall in love with TangZhong and will make more bread with this recipe.


Ingredients of TangZhong
25 g of bread flour (slightly less than 2 tbsp)
125 ml water

Ingredients of bread
200 g bread flour
50 g flour
2 tbsp of sesame powder
2 tbsp of sugar (ignore this is your sesame powder contains sugar)
2 tbsp milk powder
150 g TangZhong (use all the tangzhong that you made above)
1 1/2 tsp yeast
1 large egg
75 ml water (the amount of water is varies by different type of flour)
2 tbsp butter (cut into small pieces, softened in room temperature)


Prepare TangZhong
1. Using a whisk, combine the flour and water until the form a homogeneous mixture.
2. Heat up the mixture using low heat and continue to whisk until the mixture forms a thick solution.
3. If you have a temperature, remove the batter from the heat when the temperature reaching 65'C.
4. Immediately, transfer the batter into a bowl and cover it.
5. Refrigerates it for at least 24 hours before use it in the recipe.


Prepare Bread
1. Step 1: Combine all the ingredient together in a mixing bowl except the butter. Using a hook whisk and whisk on low speed until all ingredient blend together to form a dough.


2. Step 2: Then, proceed with medium speed. At this stage, dough appears rough and dense or the dough attaches on the hook.


3. Step 3: Continue whisking until dough is 'slapping' the bowl. During this step, you may add in the butter and continue to whisk until the butter blends well with the dough. After that, you may use 'window pane test' to check the dough readiness.


4. First proof: Roll up the dough and transfer in a bowl and cover with wet cloth/plastic wrap. Let is proof for at least 60 minutes or the dough is double/triple in size. To test the dough, gently poke the dough with a finger. The dough is ready if the indentation remain but not deflate. Remove dough to work surface and divide the dough around 50 g size. Roll them into loose ball and let is sit for around 10 minutes.


5. Shape dough: Use a roller to roll the loose ball into a flat surface (like a pizza base). Arrange on the baking pan and make sure there is sufficient gap between the dough to proof for the second time.

6. Second proof: Cover the dough with wet cloth/plastic wrap and let it proof for 40-60 minutes at room temperature.


7. Bake: Arrange the ham and cheese on top of the dough.  Brush the dough with egg wash (egg yolk mix with 1 tbsp of water). Sprinkle some parmesan cheese just before baking. This will enhance the flavor of the bread. Bake at 175'C for at least 15 minutes of until the bread is brownish.


8. Remove from the oven and let it cool down before transfer into an air tight container. The bread remain soft and fresh for at least 2 days. Since this recipe call for ham and cheese, it is advisable to put into the fridge if you need to keep for the next day.


Saturday, 22 March 2014

Nasi Lemak

Yippeee.....school holiday starts!!! I am celebrating on behalf of my kids as I do pity them due to loads of homework they have in school. Other to celebrate the beginning of the holiday, we are also welcoming some relatives from my husband side. Normally, I will choose to cook for a few days just to host them even though I am not a good cook  :)

With the experience that I had during the Nasi Lemak feast I had in February, I gain some confident to prepare Nasi Lemak today with some books and online information. I would say, today is my first time preparing this 'unhealthy' dish. Even my husband and son are so shock when they knew about my menu!!!

Anyway...just for this time and try out my recipe that sits on for years. On top of that, I am planning to cook for a vegetarian version is the meat version goes well. It is to get ready my next year Chinese New Year menu which is only 11 months later!!

Since the rice is cooked with coconut milk, the flavor is really rich and most kids will eat the rice by itself even without any other dish. Other than coconut milk, the rice is cooked with pandan leaves (screwpine leaves) to enhance to flavor.

Having this meal around with kids is always challenging as they are not able to take any chili. Thus, most of the side dishes are dried separately and no chili is added. Sambal chili is served separately for adults. On top of that, I have also specially prepared "Fried Chicken with Lemongrass and Turmeric" for my kids. 


Ingredients:

Coconut milk steamed rice
2 cups of rice
3 screwpine leaves (tie them into a knot)
Salt to taste
coconut milk
water

Tamarind juice
Tamarind pulp (size of a tennis ball), add 1/2 cup of water to become assam water, discarded the seeds

Sweet Sambal tumis
5 dried chilies
5 fresh chilies
15 shallots
1 big onion
2 cloves of garlic
1/2 tsp of belacan (shrimp paste)
1 tbsp sugar, to taste (or gula melaka for stronger taste)
1/2 tsp salt
1 to 2 cup of oil

Other ingredients
3 hard boiled eggs, cut into half
Fried peanuts and tempeh until crispy
Fried anchovies, washed, drained and fried with oil
1 Cucumber, sliced


1. Wash and drain the rice. Add the coconut milk, a pinch of salt and some water. Add the pandan leaves into the rice. Let the rice soak with the coconut milk and water for at least 30 minutes to make the rice more fluffy. The ratio of coconut milk with water is around 1:3. Cook the rice according to the rice cooker manual.


2. Rinse the dried anchovies and drain the water (Please do not soak the anchovies, if not it is difficult to make it crispy). Fry the anchovies until they turn light brown and put aside.

3. Cut tempeh into a size of 3x1 cm (depending on your preference).Fry tempeh until they turn light brown and put aside. Then, fry the anchioves until they turn light.

4. With the remainder oil, fry peanuts as well.


5. Blend the prawn paste with shallots, garlic and deseeded dried and fresh chilies. For easier blending, add in some oil (1/4 cup of oil). Blend until the ingredients turn into fine paste.


5. Use a clean pan. Pour chili paste and add in another 1/2 cup of oil into the pan. Stir fry for 10-20 minutes over medium low heat. Continue stirring until the chili paste will turn darker, light and oil separated after long stirring. Add in assam water, salt and sugar, continue stirring for another 5-10 minutes. Set aside.


6. Dish up the steamed coconut milk rice. Serve with fried anchovies, fried peanuts, hard boiled-eggs and a few slices of cucumber. In additional, you may also serve with fried chicken.


Fried Chicken with Lemongrass and Turmeric

My husband is really fond of Indian dish and he has requested me to prepare a fried chicken with some Indian flavor in it. It is a real challenge for me especially I do not really like fried food. Left with no choice, I have to Google around. Finally I manage to get similar recipe from the blog of Nasi Lemak Lover. I  did make a slight modification to suits with my family taste buds.

I have tried to use a lot of oil to fry, unfortunately it is still not that 'dry'. That is my husband's comment. I promise to fry longer so that the skin is really crispy.

Here is my first attempt of fried chicken....

Ingredients
10 pieces of chicken wings, cleaned

2 lemon grass
2 cm of ginger
5 shallots
2 cloves of garlic
2-3 tbsp of water
2 tbsp turmeric powder
2 tbsp of masalah powder
2 tps of salt
1 tbsp of corn flour


1. Blend lemon grass, shallots, ginger, garlic and water together until fine paste. Marinate chicken with all the ingredients for at least 1 hour.


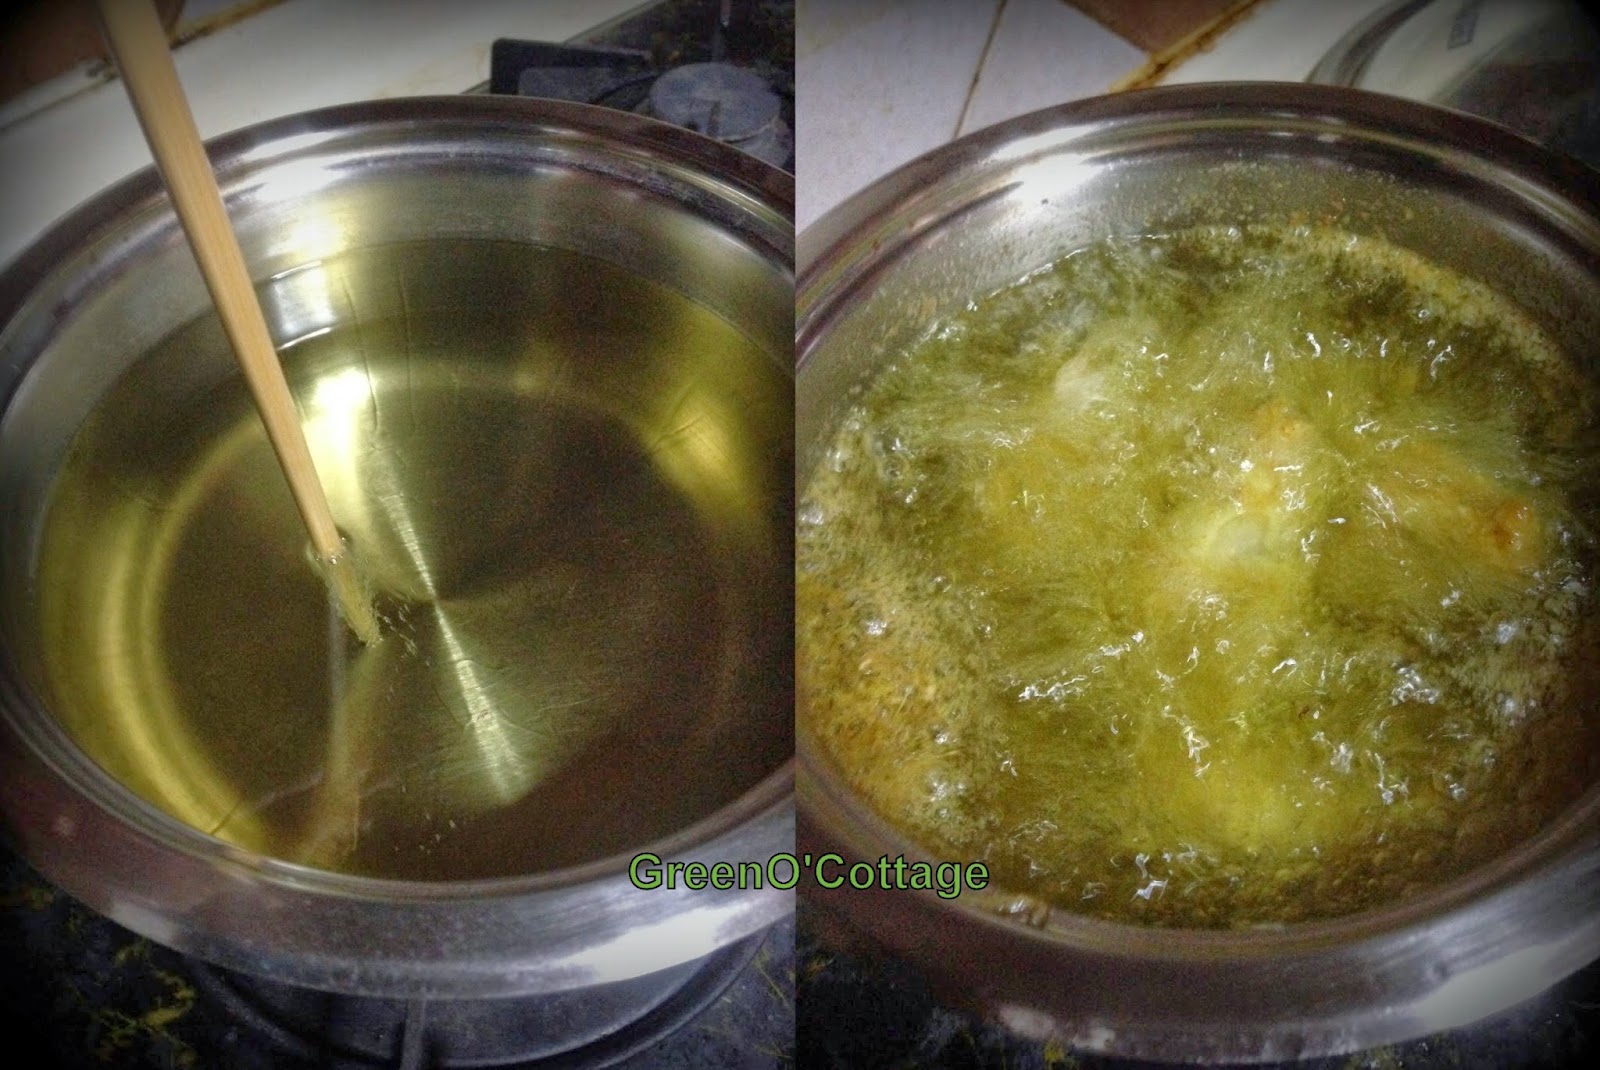
2. Heat up a pot of oil. Test the readiness of oil using a chopstick. Once fine bubble appears around the chopstick, it indicates that the temperature is sufficient for frying.


3. Fry the chicken until brown and drain the excess oil using a strainer. Serve hot.


Friday, 21 March 2014

Braised Potato with Pork Knuckle

This is a surprised dish for my friends during this Nasi Lemak feast gathering. Instead of cooking spicy dishes to match with today's theme, I am planning to cook something that is totally not spicy. The reason I am preparing this dish is because 40% of the guests are kids and I do not think the kids can enjoy the spicy food for today's theme.

This dish is originated from my grandma and passed down to my mom and now to me. That is the reason, you hardly see this dish on menu.

As usual, the freshness and cleanliness of the knuckle is really important. Since it takes longer time to braise the knuckle, I have to prepare this dish as early as possible in order to get ready by 11 am. I went to the wet market early in the morning to buy a knuckle and reminded the butcher to clean it thoroughly including removing the hair properly. On top of that, I also requested the butcher to cut the knuckle in small pieces so that it takes shorter time to soft. Am I a fussy customer?

The first thing I do is to boil a pot of hot water to blanch the knuckle to remove the blood and dirt. I would say, the most challenging part in cooking this dish is the cleaning steps. The cooking step is quite straight forward especially when it comes to braise method.

To cook this dish, you will only need bean paste, garlic, onion, cinnamon stick, ginger and potatoes. That's all!!! Isn't it easy?? After you fry the ingredients until fragrant, put in the knuckle and continue to fry a bit before adding in water to braise the knuckle until it is soft. After that, adding in potatoes and continue to cook until potatoes are soft and the gravy becomes a bit thickening.


Ingredients
1 pork knuckle (around 1-1.5 kg), removed hair, cut into small pieces
5 cloves of garlic, minced
5 shallots, minced
2 cm ginger, minced
5 cm cinnamon stick
3 tbsp of bean paste
sugar to taste
2 tbsp of oil
5 potatoes, cut into 4 pieces
Sufficient water


1. Boil a pot of hot water to blanch the knuckle. This step is really important to remove any blood and dirt in the knuckle. Blanch for around 1 minute and then remove from the pot. Keep aside.

2. Minced all the ingredient together; shallots, garlic, ginger and bean paste. 


3. Heat up a pot. Add in oil and then the bean paste together with all the minced shallots, garlic and ginger. Using low heat, stir fry the ingredient until fragrant. The oil may dry up. Do not worry as we add in the knuckle and fat from knuckle will flow out later.

4. Then, add in the knuckle and continue to stir fry until all the knuckle pieces are being covered with the bean paste. Add in 1 liter of water and let the knuckle to braise using low heat. Add in the cinnamon stick at this stage.


5. Continue the braise the knuckle until it is partly soft. Normally, it takes around 30 minutes. After that, add in the potatoes and continue to braise until potatoes are soft. Let some of the potatoes to melt and give thicken the gravy before turn off the heat. You may add in some sugar to give a better taste.


Thursday, 20 March 2014

Sweet and Sour Pork Chop

Last night, before I went to bed, my son requested me to prepare pork chop for lunch. Since this is a request from my beloved son and to keep the promise, I woke up really early to the market to get the best pork chop from the stall. I went to the butcher directly and bought 4 thin slices of pork chop. I would prefer a thin slice which is around 1 cm thick as it is easier to cook.

My mom ever told me the secret to tenderize the chops is to 'hit' and 'slap' the chops. In order to make the chops tender and soft, the meat needs to hit with the back of the knife. After hitting both sides, the meat should be slapped with the side of the knife. Each side of the meat should be slapped for at least two times. This process is very important to tenderize the meat without using any chemical.

After the hitting and slapping steps, the meat is ready to marinate. Marinate with sesame oil, salt and pepper in order to enhance the meat flavor. Marinate for at least 30 minutes before pan frying the meat using low heat. Arrange the chops in the pan with the thickest, boniest parts towards the center of the pan where they get the most heat. Sear the chops, about 2 minutes on each side. Watch carefully, as soon as the chops are browned, flip them and once both are ready, you can turn off the heat. Since, this meat will later braise with some sauce, it is fine if it is still uncooked.

While waiting for the meat, you may prepare the sauce. The sauce is prepared by mixing the ketchup, plum sauce and a little bit of sugar. Do not add in water as this will dilute the sauce.

Other than having a good pork chop, onion is also another important ingredient. Pan fry the onion slices until translucent before adding in the chops. This will bring the onion flavor into the meat. Continue to stir fry until the meat is cooked. You may add in some water if the pan is too dry and let it braise a while.

Once the meat is cooked, stir in the sauce and continue to stir fry until the sauce is dried up. You may serve this dish with warm rice.


Ingredients:
Pork chops
4 thin slices of pork chops, hit and slapped with the knife
1 tbsp sesame oil
salt to taste
pinch of pepper

3 tbsp of custard flour
1 tbsp of corn flour
sufficient oil for searing

Sauce
3 tbsp ketchup
3 tbsp plum sauce
1 tbsp sugar


1. To prepare the meat, use a back of the knife to hit both sides of the meat. After that, use  the side of the knife to slap the meat for at least two time on each side. These steps will tenderize the meat even without using any chemical.


2. After the tenderizing steps, the chops have to marinate with some salt, pepper and sesame oil for 30 minutes. Just before searing, coat the meat with custard and corn flour.

3. Heat up the pan to medium or high heat (hot enough to sear the meat). Once the pan is hot, add a teaspoon of oil or fat to the pan and coat the bottom of the pan. Put the chops in the pan. Make sure they are not crowding each other too much. There should be space between the chops in the pan or the meat will steam and not sear properly. Sear the chops, about 2 minutes on each side. Watch carefully, as soon as the chops are browned, flip them and once both are ready, you can turn off the heat. Since, this meat will braise later, it is fine if it is still uncooked.

4. Remove from the pan and cut into small slices.


5. In the mean time, prepare the ketchup sauce by mixing all the sauce ingredient together.


6. Heat up the wok and add in a teaspoon of oil. Then, add in the onion and stir fry until the onion is translucent. Add in the small pieces of chops and continue to stir fry. Add in some water and let the meat to braise until the meat is cooked.


7. Once the meat is cooked, add in the sauce mixture and continue to cook until the meat absorb all the sauce. Let the sauce thicken before remove from the pan.