Wednesday, 3 December 2014

Soft and fluffy Pumpkin Chiffon Cake

I was so shocked when I saw plenty of pumpkin in the supermarket and it reminded me of Halloween festival. My family does not celebrate Halloween; in fact my son always complaining of having nightmare around this season. I think it is due to his illusion from the scary advertisements. Anyway, since there are so many pumpkin, I have the urge of baking Pumpkin Chiffon. Unlike other cake, Chiffon cake is light in texture and can be prepared in a short time without much hassle.

Before preparing the baking ingredient, it is important to prepare the pumpkin in advance in order to make sure that the pumpkin puree is cool down before blending with other baking ingredient. As I shared in my other Chiffon cake post, the secret of having a fluffy texture for this cake is to have a perfect stiff egg white. Without a perfect stiff egg white, you will never get the soft texture of Chiffon Cake. The eggs need to be at room temperature so they will reach their full volume when beaten. Always use fresh egg as it is much easier to beat. Adding a little cream of tartar helps with it. although you can leave it out. Cream of tartar is used to give stiffness to the egg whites, so that the cake will not collapse easily. Not to forget to use a very clean mixing bowl to ensure egg whites can be whisked up easily until very stiff.

It is important that the batter is baked in an ungreased tube pan which allows the batter to cling to the sides of the pan as it bakes. The tube in the center of the pan lets the hot air circulate so the heat can reach the center of the bake and not over bake the cake. The cake needs to be turned upside down immediately upon removing it from the oven as this keeps from shrinking and losing its volume.

Hope the above tips, you will be able to bake a soft and fluffy Pumpkin Cake!

Ingredients
Egg Yolk Batter
80 g cake flour
70 g pumpkin puree
1 tsp baking powder (optional)
30 g castor sugar
5 medium egg yolk
1/4 tsp salt
80 ml milk/ coconut milk
40 g oil

Ingredient B
5 medium egg white
1/2 tsp cream of tartar (optional)
40 g castor sugar


1. Preheat the oven to 175'C and have ready a 22cm ungreased chiffon cake tin.

2. Sieve cake flour and baking powder together. Put aside.

3. To make the egg yolk batter, whisk egg yolks and castor sugar together until the batter is pale yellow. Combine with salt, oil and milk together. Stir in one direction until smooth and well-combined. Fold in flour until forms a smooth batter.

4. You may filter the batter to remove the lumps.


5. In another bowl, put in egg whites and cream of tartar into a clean mixing bowl. Use high speed to whisk until frothy. Add in sugar slowly. Continue to whisk until stiff but not dry. (Please refer to the video "How to whip egg white")

6. Once the egg whites are ready, gently fold in the stiff egg whites (in three additions) to the cake batter. (Please refer to the video "How to fold in egg white")


7.Pour the batter into a 22cm ungreased chiffon cake pan and bake at 175'C for about 10 minutes and then 165'C for around 30 minutes. You may test the cake readiness using the toothpick method.


8. Remove from oven, invert (turn upside down) and leave to cool completely before removing cake from the tin.


Wednesday, 26 November 2014

Sambal Fish

Holiday....I really need a break. I have been so busy with my son's examination that I have no time to update my blog. My daily activities were just 'studying' and nagging! Really a tough job especially to control another person. After two months of stress, finally, I can start to write again. I do hope when my kids read these posts in future, they can recall the way I used to nag them.
 
Sambal Fish is one my of favourite childhood dish. I can easier finished up 2 stuffed fish whenever it was served with warm rice. The rice has to be warm or hot rice so that you can get the 'high' sensation.....hot from the rice and chili!
 
In this recipe, I have added kaffir lime leaves in order to give some Thai flavor. The secret of having a good sambal besides the spiciness is the sweetness and sourness. Another secret of having a good chili paste stuffing is to precook the chili paste before stuffing it into the fish as the aroma of the chili paste is stronger after cooking. With this additional step, you can use less oil when frying the fish.
 
Whenever my mom prepares this dish, she will use Hardtail Mackerel fish but today, I have to use snapper as there is no mackerel in the market. To my surprise, snapper turns out to be a better fish as its flesh is so smooth.


Ingredients

9 pieces of shallots
2 cloves of garlic
6 pieces of chilies
3 pieces of Bird's eye chilies (cili padi)
3-4 pieces of Kaffir lime leaves
3 pieces of lemon grass (use only the white portion)
1 tsp of belacan powder
1/2 cup of oil
salt and brown sugar to taste
2-3 tbsp tamarind juice (dissolve 10 g of assam pulp in 4 tbsp of water, liquid strained)

2 snappers (make a deep slit at the back of the fish to create a pocket)


1. Blend all the ingredients together until fine. Blend together with oil in order to achieve a fine texture.


2. Pour all the chili paste on a pan. Then, use medium heat to heat up the pan slowly fry the chili paste till the oil reappear. Taste with sugar, salt and tamarind juice. Let it cool down before stuffing into the fish.


3. Then, heat up some oil in a non-stick pan and then fry the fish using medium heat. Dish up once the fish are done. Serve with some lime and Belacan Dipping Sauce.


Friday, 24 October 2014

Mooncake-Taro/Yam Flaky Mooncake (芋頭酥)

It is all started from my friend who encouraging me to make mooncake this year. I do not have the 'push factor' until the eve of Mid Autum Festival after trying her snowskin mooncake. Since this is my first attempt, I have chosen an easier version for myself.....Yam Flaky Mooncake. The yam filling is easier to prepare than the lotus paste although there is a slight challenging in rolling out the skin. It takes time to be master. It takes me two days to master with the rolling. That is the reason, the actual quantity of my finished product (mooncake) turns out to be lesser as the filling was the balance from the earlier day.

The skin of this mooncake requires two different dough: Oil dough and Water dough. You may use butter as the leavening agent but the strong flavor of butter will eventually cover the yam's flavor. I would recommend to use vegetable oil for mooncake since we want to really enjoy the flavor of the filling.

For the filling, I used the ratio of 1:5 of oil to yam and I noticed that it is too dry. In my next trial, I am planning to increase the quantity of oil in order to improve the wetness of the filling. Smoothness is an important factor in the mooncake filling. Insufficient oil, the filling will look a bit dry. That is the reason I do not even dare to let my dad to try this batch of mooncake due to the dryness of the filling.

Some recipe calls for color. Since I am always using natural color, I am using beetroot this time as it is the only color I have in my fridge. That is the reason my mooncake does not look like the traditional mooncake color. For other color preparation, please refer to my blog on "Natural Food Coloring".


Yam Filling (20-24pcs)
500 g of yam filling
100 g of castor sugar
100 g of vegetable oil (you may use shallot oil for more fragrance)
A pinch of salt
30 g of wheat starch

Oil Dough
200 g of all purpose flour
90 g vegetable oil

Water Dough
230 g of all purpose flour
80 g water and coloring (beetroot)
80 g vegetable oil
30 g castor sugar
1/2 tsp vinegar

1. Yam filling: Cut the yam into slices and then steam using medium heat until the yam is soft. Immediately, transfer the yam into a food processor and blend with oil, sugar, salt and wheat starch. Set aside and let the filling cool down. Weighing out the filling at 35 g each.


2. To prepare the oil dough, mix flour and oil well. Knead for a while and let it rest for 30 minutes. Similar method is applied on the water dough except, you need to spend around 3-5 minutes in kneading the water dough in order to form a soft dough. Let water dough to site for 30 minutes as well.


3. After 30 minutes, divide the dough evenly by dividing each the weight of water dough and oil dough with 10 pcs.  Roll them in a ball.

4. Assembly: It is important to pay some attention on the rolling. Here is a good link of video showing how to roll the skin. Video of making Flaky Mooncake by KiwiSite


5. Preheat oven at 175'C and bake the mooncake for around 20-25 minutes.


Tuesday, 23 September 2014

Natural Color Rainbow Cake

Finally, it comes to the eve of my son's birthday (9 Years Old). Tonight, I have to bake at least 6 layers of butter cake with different color. Why at least 6 layers? It is because I might fail in the first attempt and need to re-bake it. Anyway, it is a really an exciting night for me. 

For the coloring, I opt for natural color. As a health conscious person, I am really worried on the chemical in the food coloring. With mentally and physically prepared, I am planning to use natural color for this cake. I think it is really important to get yourself physically prepared as you need to do a lot of cleaning and cooking in order to get the different color. Why mentally? It is because the color that you want to achieve may not be as nice as the artificial coloring. The color may not be as intense or as sharp as you thought.

You may refer to my website on the preparation of "Natural Food Coloring". Although it is tiring, I would say it is worth to spend some time as you do not have to worry on the chemical in the food coloring. Trust me....healthy is the most important. Do not think of tiredness...just take it as an enjoyment to prepare healthy food for the family.

Having said that, I do really feel proud of myself for spending so much time and effort in preparing the natural color for this cake. At the end of the day, you will feel the satisfaction when you see your kids enjoying the cake that is safe with natural color. No preservatives and no artificial coloring  :)


Ingredients for 1 layer of 8" round cake
100 g cake flour
60 g sugar
1 tsp baking powder
90 g butter
20 ml (milk and coloring)
3 small eggs
(NOTE: For the green color cake, you may add in 1 tsp of green tea. Other ingredient remain the same)

1. Preheat oven at 170'C.

2. Whisk butter and sugar until fluffy. Then, slowly blend in the eggs, milk and coloring while folding in the flour until everything is blended well.

3. Pour into a baking pan. Layer the batter well and bake for around 5-10 minutes. (Make sure that you had layered a piece of wax paper onto the bottom of baking pan)

4. Cool down the cakes, and put into fridge for at least 2 hours or overnight. This step is to ensure that the cake layers are harden and much easier to handle during assembly steps.


I have forgotten to take 2 batches of color....maybe I am too rushing  :)


Assembly the cake

This is the most important stage. We do not want to have a topple or uneven cake. I am using butter cream for my layering icing because it gives a stronger holding power as compare to whip cream. As a beginner, I always go for a safer approach. If you are a beginner, please watch the video on How to Decorate with Buttercream before started on the assembly steps. 


Butter cream
240 g butter
600 g icing powder
4 tsp vanilla essence
120 ml milk (or less, depending on the butter cream consistency)


Layering a thin layer of butter cream in between each layer of butter cake 

1. Butter cream acts as the 'glue' for the layering. Thus, before starting any layering, apply some butter cream on the cake board. Then, put on the first layer which is red onto the board. Make sure the cake layer sticks well on the board.

2. Then, starts applying a thin layer of butter cream on top of that red layer. Thickness should be around 2-3 mm as you do not want the cake to be so creamy. Do not worry of the appearance. 

3. After the butter cream is evenly spread onto the red layer, put orange layer on the top. Apply butter cream and repeat the same steps for other layers. 

4. Please remember to follow the RAINBOW COLOUR arrangement: RED, ORANGE, YELLOW, GREEN, BLUE, VIOLET

5. With the remainder of the butter cream, you may use to layer the side of the cakes to make sure that the gap is filled. 

6. Transfer the cake into the freezer to harden the cake again before frosting.


Frosting the cake: Cream Cheese frosting
225 g Cream Cheese
60 g butter
1 tsp vanilla essence
150 g icing sugar
NOTE: You may need to adjust the sugar according to the frosting consistency at room temperature. If the weather is warm, you need less of the icing sugar as cream cheese is softer. I have accidentally using 200 g and it is actually flowing down (eye tears) when I used it for my frosting.


Colorful layers....the color is not as attractive compare with 'food coloring'


Saturday, 20 September 2014

Natural Food Coloring

Coloring is an important ingredient in any baking. We want our cake to look attractive, thus coloring is important to achieve that outcome. There are a lot of negative comments on the food coloring and this makes me quite worrying whenever I am using food coloring. Due to my laziness, I always find an excuse to go for food coloring.

Everything changes today. I want to go for Natural Color from now on. We have been eating a lot of unhealthy food and I do not want my home becomes another unhealthy place. Everything comes in 'yin and yang'. If too much 'negative' food, at home always have to provide 'positive' food to balance up the life. This is just my thoughts. Maybe it is not correct  :)

Here are the colors that I would like to prepare:

Violet: Blueberry
Blue: Purple cabbage
Green: Green Tea
Yellow: Saffron
Orange: Carrot
Red: Beetroot


Since I am going for natural color, I always prepare the color a few days in advance. I froze the color in the freezer and defroze them by locate them in the vegetable compartment for a few hours before use them to bake any cake.


Here is the preparation of the colors:

1. Red: 1 medium Beetroot 
Beetroot is the best coloring due to its intense color. The color is so dark and you do not need to use a large quantity of it. The juice of the beetroot can be easily extracted using a juicer.  Then, transfer the juice into a pot and cook over a medium heat until it is thicken up.


2. Orange: 3 medium Carrots
Juice out the pure carrot juice using a juicer. Then, transfer the juice into a pot and cook over a medium heat until it is thicken up. The color looks a bit darker.


3. Yellow: 1 tbsp Saffron
Transfer Saffron into 2 tbsp of hot water. Let it sit for half an hour until the color is extracted out.


4. Blue: 1/2 medium purple cabbage  
Boil 100 ml of water. Put in the cabbage and let it boil until the cabbage leaves are soften or for around 10-15 minutes. Strain out the cabbage, reduce the liquid until it is thicken. Add just the tiniest pinch of baking powder (you really have to go slowly here or you can turn the whole batch green). Keep adding baking soda in small amounts until the color just turns blue. Remember,  the color of blue can still change. If you add it to an acidic food, it will go right back to purple.

I was accidentally added too much of baking soda and the color turns out to be slightly greenish


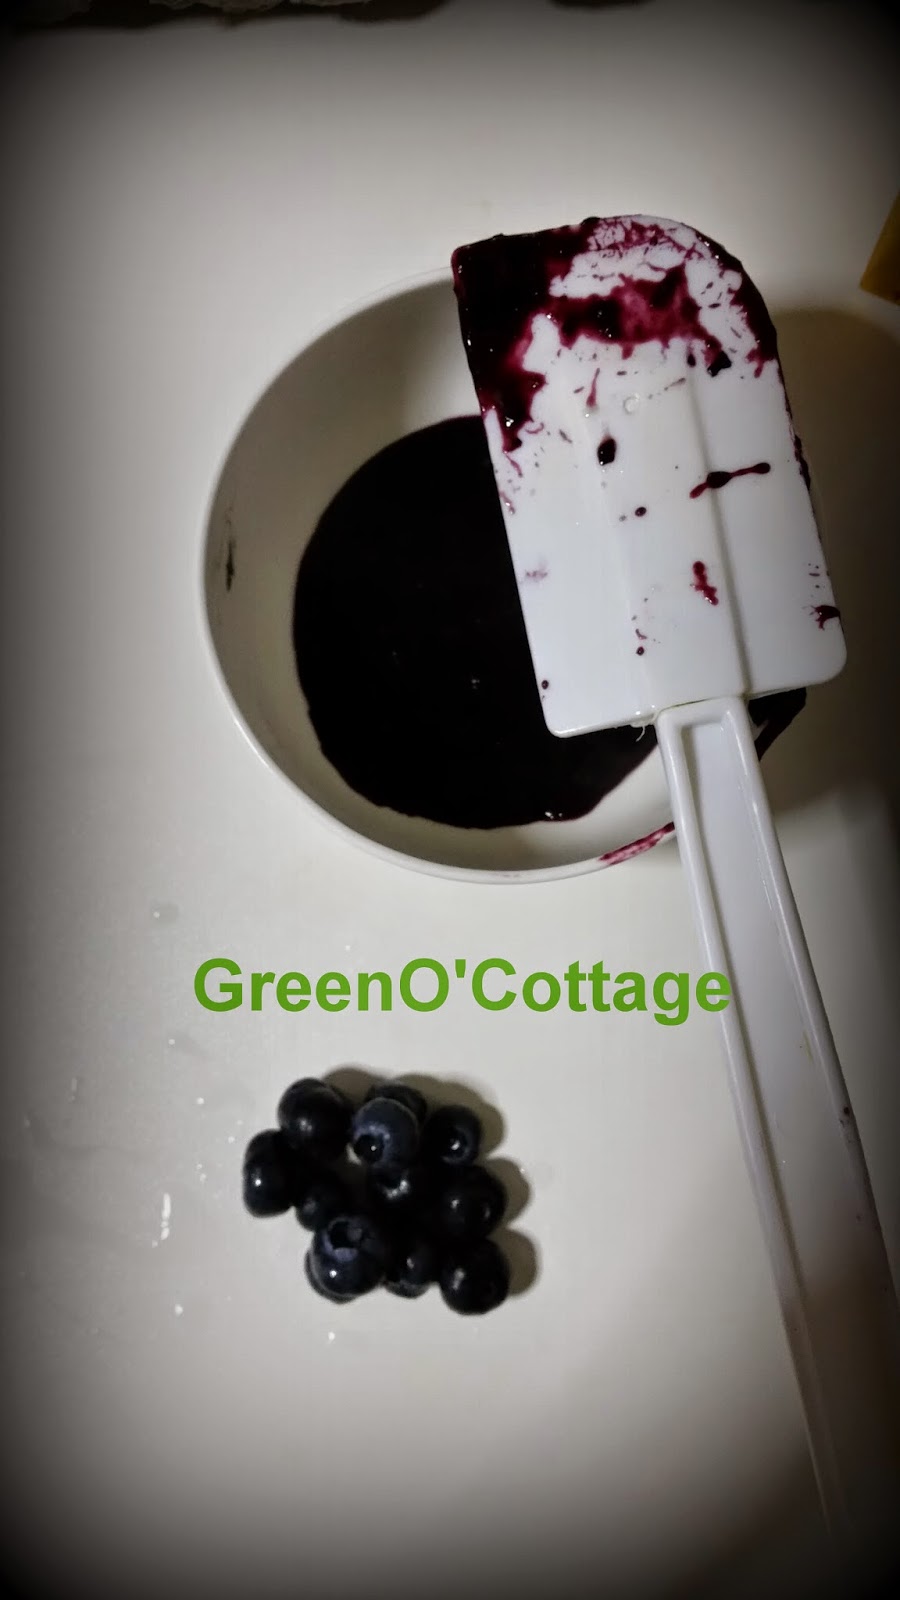
5. Violet: 100g of blueberries
Wash and blend all the blueberries in a blender. Then, transfer the juice into a pot and cook over a medium heat until it is thicken up.


Thursday, 4 September 2014

Black Tagliolini with Cream and Mushroom

Few weeks ago, I bought myself several packets of squid ink from a grocery shop. I was really happy and bought 4 little packets that can make 400 gram of pasta dough. That is the first thing that came across my mind when I saw the squid ink.

I have no time to explore into it until few days back when I have to stay at home to look after my fever girl. While she was sleeping, I managed to steal around 2 hours to prepare the black Tagliolini.


Black Pasta Dough
Despite its dramatic black color, this pasta has a delicate flavor with just a hint of the sea. My kids find the color is so special and love it very much. Now, they are started to ask me to prepare different color of pasta.

Ingredients
1 tbsp squid ink
4 eggs
400 g plain flour

1. Mix the squid ink with the eggs, then blend this mixture with the flour. Knead properly until all the ingredient are blended properly and forming a dough. Let it rest for 20 minutes before roll at the pasta machine. Do not worry if the color is not uniform as you will eventually obtain a uniform pasta after several passes through the pasta machine.


 2. The pasta machine takes a lot of the hard work out if the rolling and stretching process. Just remember that you still need to take the time to work through all the settings until you reach the final setting in order to obtain the elasticity and silkiness that gives the best pasta. Different machine may work differently and please read through the machine instruction for the rolling and stretching process.

3. After getting the desired thickness, dry the pasta sheet for around 30 minutes before cutting into the desire width. I am drying the pasta by hanging the sheets over the chopsticks.
(NOTE: You may need to use a lot of flour to dust the final noodle in order to prevent them from sticking)

4. After drying process, you can cut the pasta using the pasta machine. In this case, I am using fine setting for the pasta noodle. Dust the noodle with a lot of flour to avoid the prevent the noodle from sticking.


Mushroom Sauce
Ingredients
3 tbsp olive oil
200 g of mushroom mix mushroom, brown and white mushrooms; removed all the roots
200 g bacon, cut into small pieces
200 ml of cooking cream
1 medium onion, diced
salt to taste
pepper to taste
a dash of parmesan cheese

1. Prepared all the ingredient and set aside.

2. To prepare the sauce, heat up the olive oil in a pan . Saute the onion until it is soft. Add in bacon and continue to saute until the bacon is brownish. Add in mushroom and saute for around 1-2 minutes until the mushrooms are soft. Add in the cooking cream and continue to braise for another 1 minute. Off heat and set aside.


3. To prepare the spaghetti, cook it with plenty of boiling water until al dente. Since this is a fresh pasta, the total time to cook the pasta will be shorter. Drain, reserving a little of the cooking water.

4. Heat up the sauce and transfer pasta into the sauce. Toss well and season with salt and pepper. Serve immediately with Parmesan Cheese.


Saturday, 23 August 2014

Ipoh Shredded Chicken Rice Noodles (Kai See Hor Fun) 怡保鸡丝河粉 (Version 2)

Why is there a version 2? Is it an improvement from Version 1?
Yes....it is and by judging only from the photo itself, you can tell that there is a lot of different!

The secret of version 2 lays on these two items: Prawn oil and Chicken soup

In my previous attempt, personally I do not find that the color of my noodle is very impressive. There is not enough 'red' color in my soup. I have been scratching my head thinking of which ingredient could give the 'red' color... definitely not chili; how about prawn's head? I tried to cook prawn's head with oil using low heat and to my surprise, red oil is produced!!! It is really amazed me.

Another improvement is the soup itself. In this attempt, I have added sweet turnip in my soup and it makes the soup change to slightly milky. The taste is so 'sweet' and the color is really looked like the one I found in Ipoh. I am really happy to announce that this is a real Ipoh Kai see Hor Fun!!!


Ingredients
(Serving of 4-6 persons)

For the broth
1 medium chicken 
3 liter of water
300 g of prawns, washed and deveined (reserved the prawn shells)
300g sweet turnip
Rock sugar (about 5 pieces or to taste)
Salt to taste
2 tbsp of oil

Shrimp oil
200g prawn's head
125ml oil


Garnishing
Chives
Fried onions (shallots)
Bean sprouts
Shredded chicken


Making the shrimp oil
1. Heat up the oil using low heat. Add in the prawn's head and saute until the oil is separated out.


Making the broth
1. Heat up 3 liter of water. When the water boils, soak the chicken in the water. Lower the heat and let it cook until it is done. It takes around 40-50 minutes. Upon cooked, immediately transfer the chicken to a pot of cold water and let it soak for at least 10 minutes. This step is important to make the meat juicy and tender. Then, remove the flesh from the bone. Put the bones back to the chicken stock. Reserve the chicken meat; shredded before serving the meat.
2. Using the same wok, saute the prawns shells for around a minute or until they turn to golden colour. Then, transfer to the chicken stock (step 1). Normally, I will use some water to raise the pan to make sure that all the prawn's juice that are stick on the pan is being transferred to the chicken stock (with bones). Simmer for an hour or longer until you see a milky chicken broth.

3. Strain the stock. Taste with sugar and salt. You may use chicken stock concentration to enhance the taste (optional).


Garnishing
4. Shredded the chicken meat and set aside.

5. Blanched the prawn meat in the soup, removed.

6. Cut chives into 1 inch strips. Blanch


Noodles
7. Blanched a serving of hor fun and bean sprouts in a pot of boiling water for around 5-10 seconds. Put into a bowl. Add some prawns, shredded chicken and chives. Then, add in the boiling broth. Before serving, garnish with fried shallots.


Friday, 15 August 2014

Spinach Seafood Spaghetti

To cook any dried pasta, it is important that the pasta should be cooked until it is al dente-that is, soft on the outside but still firm to the bite on the inside. Al dente can be achieved by cooking dried pasta for 1 or 2 minutes less than the suggested time on the packet. While the pasta is cooking, pick out a piece occasionally with a fork and chew on it, to see if it as reached the desired texture. I personally like pasta very al dente, so I cook my spaghetti for only 5 minutes or so.

As soon as the pasta is cooked to your satisfaction, remove it from the heat and drain it, retaining a little of the cooking water, which can then be used to moisten the finished dish if it seems too dry. I usually like to add the drained pasta to the pan containing the sauce, so the pasta absorbs the sauce in the final minutes of cooking.

To cook Spinach Seafood Spaghetti, it is important to have sufficient spinach which has been blended with sufficient olive oil. Unlike Pesto, this spinach sauce is cooked with seafood to enhance the flavor of this sauce. I am really hope that your picky kids love this dish.


Ingredients
400 grams dried spaghetti
200 grams prawns, washed and deveined
2 pieces of squid, cleaned and cut into pieces
250 grams bacon, cut into small pieces
250 grams of spinach, blended with sufficient olive oil
1 small onions, diced
2 tbsp of olive oil
3 slices of Cheddar Cheese
1 tsp of dry basil flakes
salt to taste
pepper to taste
A dash of Parmesan Cheese


1. Prepared all the ingredients and set aside.

2. To prepare the sauce, heat up the pan. Saute the onion until it is soft. Add in bacon and continue to saute until the bacon is brownish. Add in squid and prawns. Saute for around 1 minute before adding the the blended spinach. Continue to saute until spinach is cooked. Do not worry when you see plenty of water. Off heat and set aside.

3. To prepare the spaghetti, cook it with plenty of boiling water until al dente. Drain, reserving a little of the cooking water.

4. Sprinkle the basil into the sauce, put the pan back over low heat and add the spaghetti. Add in the Cheddar Cheese, salt and pepper. Toss well until the Cheddar Cheese melts and incorporates with the spaghetti. Add in a tablespoon or two of the reserved cooking water if the sauce seems too dry. Serve immediately with Parmesan Cheese.


Thursday, 31 July 2014

Chicken Broth

Chicken broth is very easy to prepare and it is normally used as a soup base for all kind of noodles, eg. Ban Mian, Ipoh Shredded Chicken Rice Noodles.

The secret of having a good flavor of soup is to make sure that the water is boiling before adding in all the ingredients. In order to avoid any blood residue in the soup, it is important to blanch the chicken carcass in the hot water before transferring it into the soup pot. For the first 30 minutes, it is important to make sure that the water is boiling and then, you can reduce to low heat and continue to simmer for another 2 hours.


Ingredients
2 whole chicken carcass
50g dried split anchovy
150g sweet turnip (peeled, chunked)
10g rock sugar
1/2 tbsp crushed pepper
5 liter water
salt to taste

1. Bring the water to boil. Put all the ingredients in the pot and reduce to low heat.
2. Cook for approximately 2 hour. Add in salt and sugar.
3. Sieve the broth and set aside.


Ban Mian (拌麵)

Guess what, I have bought myself another toy....Pasta Machine!! I have been thinking to own this machine whenever I made dumpling. I wish I could make different dumpling skin color. That is my goal but I am not too sure whether I have the persistent to achieve my goal. 

For the "opening ceremony" of my machine, I am planning to make Spinach Noodle. Besides nutritious, it is also easy to prepare as you just need to mix the blended spinach into the flour before passing through the Pasta Machine.

To be honest, it is really time consuming to prepare the noodle from scratch. One needs to be very patient and in my opinion, it is really worth the time as the noodle texture is really different as compare with the commercial noodle.


Ingredients A
500g plain flour
2 eggs
2 tbsp cooking oil
150-200 ml water
50g of spinach, washed and blended
(NOTE: 100g flour per person)

Ingredient B
300g minced pork
250g dried anchovies
50g black fungus, soaked and shredded
10g mushroom, soaked and shredded
300g green leafy vegetables, blanched
100g shallots, sliced and deep fried

Seasoning
1 tbsp soya sauce
1tsp pepper
1tsp sugar
1tsp sesame oil

3000ml chicken broth

Noodle (Ban Mian)
1. Combine all ingredient A, and knead lightly until it becomes a smooth dough. Cover the dough with cling wrap and let it sit for 20 minutes before roll with the pasta machine


2. The pasta machine takes a lot of the hard work out of the rolling and stretching process. Just remember that you still need to take the time to work the dough through all the settings until you reach the final setting in order to obtain the elasticity and silkiness that gives the best pasta. Different machine may work differently and please read through the machine instruction for the rolling and stretching process.

3. After getting the desired thickness, dry the pasta sheet for around 30 minutes before cutting into the desire width. I am drying the pasta by hanging the sheets over the chopsticks.
(NOTE: You may need to use a lot of flour to dust the final noodle in order to prevent them from sticking)


4. Boil a pot of water and cook the noodle for around 1-2 minutes until reaching your satisfaction.

Meat and mushroom sauce
5. Heat up 2 tbsp oil to stir-fry minced pork until fragrant. Add in shredded mushroom, black fungus and seasoning. Stir-fry until the meat is cooked. Add in some water if the gravy is too dry and continue to stir-fry until the sauce is slightly absorbed. Dish up and set aside.

6. Place a portion of noodle in a serving bowl, pour in hot chicken broth, serve with minced pork, fried anchovies and leafy vegetables. Garnish with some fried shallots on top. Serve top.

Soup base Ban Mian

Dry version of Ban Mian


Friday, 25 July 2014

Soft and Fluffy Black Sesame Chiffon

Once you have master the skill of making chiffon, you can blend in any ingredient to make it into different flavor. Since my son has to attend a Birthday Party later, I am planning to bake a Sesame Chiffon Cake for him to bring over. Why Sesame Chiffon? It is simply because I love sesame and it is the only ingredient that I have.

Since the packet of sesame that I had is already premixed with sugar, I am planning to reduce some sugar quantity in this recipe. To start off my experiment, I will normally try to maintain all the quantity in my original recipe as this will make my life whenever I need to tweak the 'formulation'.

I am lucky enough that this Sesame Chiffon is quite easy to bake and no adjustment on the original recipe is needed. One time succeeded!!!! If I would to improve this cake, I am planning to increase the quantity of my sesame by 10g in my next trial. This will make the sesame flavor denser.

Off I go......start experimenting  :)


Ingredient A
Egg Yolk Batter
80g cake flour
25g sesame powder
1tsp baking powder
30g castor sugar
5 medium egg yolk
1/4 tsp salt
80ml milk
50g oil


Ingredient B
5 medium egg white
1/2 tsp cream of tartar
40g castor sugar


1. Preheat the oven to 165'C and have ready a 22cm ungreased chiffon cake tin.
2. Sieve cake flour, sesame powder and baking powder together. Put aside.
3. To make the egg yolk batter, whisk egg yolks and castor sugar together until the batter is pale yellow. Combine with salt, oil and milk together. Stir in one direction until smooth and well-combined. Fold in flour until forms a smooth batter.
4. You may filter the batter to remove any lump.


5. In the other bowl, put in egg whites and cream of tartar into a clean mixing bowl. Use high speed to whisk until frothy. Add in sugar slowly. Continue to whisk until stiff but not dry. (Please refer to the video "How to whip egg white")
7. Gently fold the stiff egg whites (in three additions) into cake batter just blended (being careful not to deflate the batter). (Please refer to the video "How to fold egg white")


8. Pour the batter into a 22cm ungreased chiffon cake pan and bake at 165'C for about 40-50 minutes.You may test the cake readiness using the toothpick method.

9. Remove from oven, invert (turn upside down) and leave to cool completely before removing cake from the tin.

Opps....there is a small defect at the corner.
Next time will be more careful when trying to remove from the pan  :)


Dry, soft and fluffy Sesame Chiffon!!!


Friday, 11 July 2014

Milky Fish Soup

Fish soup has been regarded as a nutritious food and is considered by the Chinese traditionally to be particularly good for lactating women as part of the postpartum confinement diet. On and off I would crave for this soup due to its strong taste. You may eat this with rice or noodle with some 'yong tau fu' (stuffed tofu)

The secret of resulting the milky soup base is to use boiling water to pour over the fried fish. After that, simmer the soup for another 1.5 hours to get a milky soup base. In order to remove the fishy smell, ginger and blue ginger are the best ingredient. Prior to fried, I will normally marinate the fish bone using some ginger juice to remove all the smell. On top of that, blood clot needs to be discarded prior cooking.


Ingredients
Fish soup 
300g fish bone
140g preserved vegetable
1 piece of tomato
3 inches of ginger, sliced
2 inches of blue ginger, sliced
1/2 tbsp pepper corns, crushed
3 liter of boiling water
3 tbsp oil
salt

1. Clean the fish bone with some salt and ginger juice to remove the fishy smell. Discarded any blood clot. and rinse off properly.


2. Heat up oil in a pot. Fry the fish bone until brownish. You may fry together with ginger and crushed pepper corn to spice up the soup. Once the bones are done, pour in hot boiling water into the pot and simmer for 5 minutes before adding in the tomato, preserved vegetable and blue ginger. Then, reduce to low heat, cook approximately for 1.5-2 hours. 

3. Add in seasoning, stir well, remove from heat, and strain stock. You may add in your favorite vegetables or noodle in the fish soup.


Sunday, 6 July 2014

Braised E-Fu Noodle (Yi Mein)

The preparation of this noodle is really simple and hassle free to cook. It only takes around 30 minutes to prepare this dish. As compare to other noodle, Yi Mein is much easier to cook as it is less soggy. The most interesting part of this noodle is the chewiness and spongy texture. I normally having this dish with my favourite Belacan Sauce will enhance the appetite!


Ingredients
100 g prawns, washed and deveined 
100 g pork, slice thinly
1 pcs of fish cake, slice
3 stalks of sawi (Chinese Mustard Green)
2 cloves of garlic, minced
3 stacks of noodles, cut into 3" length
3 bowls water (chicken broth)
2 tbsp oil

Seasoning
1 tbsp of soy sauce
1/2 tbsp dark soy sauce
1/2 tsp sesame oil
1/2 tsp sugar
Dash of pepper

1. Marinate pork and prawns with the seasoning for 20 minutes.

2. Heat up oil. Saute the garlic for 30 s and add in the marinated pork and prawns. Stir-fry briskly for a minute before adding in the Chinese Mustard Green and fish cake.


3. Continue to stir-fry for another minute. Pour in the water or chicken broth. Bring to boil and add in the noodle. Cover, braise over medium heat until the flavour has been absorbed and the gravy is slightly thicken.

4. Dish up, serve at once with Belacan Sauce.


Friday, 13 June 2014

Vegetarian Fish

The presence of seaweed in this dish makes this vegetarian dish tastes so differently. Normally, I will prepare some sweet and sour sauce to serve along with this dish in order to enhance the flavour.


Ingredients
2 pcs of seaweed sheet
5 pcs beancurd sheet-soaked in water, tear into pieces

Sauce-mix together
1 pcs of firm bean curd-mashed
1 tsp ginger juice
2 tbsp milk powder
1 tbsp soya bean paste

oil for frying

1. Place seaweed sheet on top of dried beancurd sheet. Apply half of the sauce mixture on seaweed sheet and roll up tightly.


2. Steam rolls over low heat for 30 minutes, leave to cool, slice, dust with flour and deep fry till golden.


Sambal Belacan Dipping Sauce

This is a traditional dipping sauce that you can find in most families in Malaysia or Singapore. It consists of shrimp paste (belacan), chilies and vinegar/lime and usually goes with just everything....noodles, fish, and even mix together with rice! You can image that how crazy.

The most important ingredient in this sauce is the belacan. Since it is very salty and dependable on each brand's recipe, it is important to mix the belacan in, little by little, tasting as you go along. You may keep belacan in a container and can store in the fridge for 2 weeks.

Ingredients
10 chilies
3 bird's eye  (you may increase the quantity if you prefer more spicy)
2-3 tbsp belacan (you may adjust according to your taste
50 ml white vinegar

1. Blend everything together and taste. You may increase the saltiness, by increasing the belacan or salt.