Tuesday, 7 January 2014

Caramel Custard

I was 10 years old when it was my first time tasting this custard in an old shop near my hometown, Ipoh. The egg was so smooth and silky. During that time, we were not afford to have one order per person, so three siblings was sharing an order. You can imagine how precious that custard to us. We ate the
custard very slowly so that we could really taste the flavor of the custard. I could still recall that we drank every single drop of juice of the custard. My sister even licked the plate!

I was happy that I am able to taste the same custard during my trip last year. Although it is a bit too sweet for me now, it recalls a lot if my childhood memory. Even my kids love it so much.

In order to give a memorable experience for my kids, I am learning to make so that my kids will enjoy the similar food that I had during my childhood... Let the good memory flows to the next generation.

Ingredients

Caramel 
5 tbsp sugar
1 tbsp water


Custard
3 medium eggs
500ml milk
80g sugar
1tsp vanilla essence


1. To make the caramel, mix the sugar and water together. Heat with low heat until the sugar is melted and caramelized. Put a tbsp of the caramel into a bowl. For this recipe it can coat around 4 bowls. Let it set and cool down.

2. Heat up water and get ready for steaming the custard.


3. Mix all the custard ingredient together. Sieve the egg mixture to remove the bubble and any residue. Transfer the eggs mixture into 4 bowls that has coated with caramel.


4. Steam for 7-8 minutes using low heat. If the heat is too big, you may leave around 1 cm gap between the cover and pot (I am using chopstick to hold the cover). This is to ensure that the egg is not overcooked due to the high heat while maintaining a smooth egg surface.


5. Off the heat and let the custard to sit in the steam for another 5 minutes.


6. Remove the bowls from the pot and let them cool down before putting them into the fridge. Refrigerated for at least 5-6 hours before serving.


Friday, 3 January 2014

Taiwan Braised Pork Rice 'Lu Rou Fan' (滷肉飯)

This is a street food that you can easily find in Taiwan street. This is one of my kids' favourite due to the sweetness of the gravy. The preparation of this dish is quite easy but the cooking time is a bit longer. It needs at least one and a half hour to braise until the meat it soft. In order to make sure that the fat does not collapse during cooking, I have used this practice: 15 min boiling and then, 15 min off fire. Repeat this steps until the meat is soft and tender. I do understand that this step is a bit tedious, but it is worth when you see a perfect dish is served.

Another secret of this dish is to have wine in this dish. The presence of rice wine will bring back all the fragrant of the spices. On top of that, with the rice wine being added during cooking, this will reduce the cooking time of the meat.

As for sugar, it is important to use rock sugar as this sugar will give a different sweetness as compare with normal granulate sugar. It may due to the different ingredient and processes to make these sugar.

Although this dish takes quite long to cook, but the effort is worthwhile especially when you see how much your family love this dish.

Happy Cooking!

Ingredients
400g pork belly
4 cm of cinnamon
5 pieces of cloves
2 pieces of star anise
4 cloves of garlic
4 shallots
Light soya sauce to taste
Dark soya sauce for the color (optional)
100ml Chinese rice wine
Rock sugar to taste
Water to cover the meat (around 250ml)

1. Mince the garlic and onion in small pieces.
2. Cut the pork belly into 1cmx1cm size.
3. Heat up the wok and stir fry the pork belly. Do not put in any oil. Let the oil or juice from the meat flow out. You may adjust the fire accordingly if the fire is too high.
4. When the outer layer of the meat is cooked, put in rock sugar and cook till the rock sugar melts and wrap the meat. This is important is the caramel will enhance the color and taste of the meat.
5. Add in minced garlic and onion. Stir fry for around 2 minutes.
6. Then, add in light soya sauce, dark soya sauce and 500ml of rice wine. Stir fry around 1 minute before adding in all the cloves, star anise and cinnamon.
7. Add in sufficient water to cover the meat and braise for 1.30 hour or until the meat is tender. Try not to add water in between unless the water dries up.
8. Once the meat is tender add in the entire wine and cook for 2 minute.
9. You may serve with hot rice.


Wednesday, 18 December 2013

How to fold in egg white

Besides having a stable stiff egg white, folding process of the stiff egg white into the cake batter is an important step. Properly folding egg whites into your batter makes your recipe light and fluffy and so, care must be used to keep from over mixing the fluffy character of the egg whites away.

It takes time to understand and familiar with the folding process. Do not worry, practice makes perfect. I ever failed this step and spoiled my whole cake. Hopefully the following steps and attached video can help you to master the folding process.

Put about 1/3 of the whipped egg white into the batter. Using a large spatula, cut a path down the middle of the mixture with the edge of the spatula. Then gently turn half the mixture over onto the other half. Continue cutting down the middle and turning a portion over. Do not stir. The purpose of folding is to retain the air you have beaten into the whites. Be careful to only work the batter enough to incorporate the whites, and never use an electric mixer for this step. Repeat the same steps for the entire of the whipped egg white.

Tips:
  • Do not add the egg whites until you are ready to do the folding process.
  • Make sure all other ingredients are thoroughly mixed before adding the egg whites.

  •  

    Braised Radish with Ribs

    Radish has a lot of benefit in the view of Chinese Medicine (Ping Ming Health). Unfortunately, the taste of radish is really strong when it is taken raw. Due to its benefit, I have tried to make juice with radish by hoping that my kids will like it. To make the drink more attractive while minimizing the taste and odour of radish, I have blended radish juice with apple and orange juice. Even though I can 'cheat' my kids over the attractive color of the juice, the taste of radish is still strong to accept. They spit the drink immediately when their taste buds touches the juice. I am totally understand as I also find that the drink is too 'spicy' for me. I left with no choice but to braise radish for them and it turns out they love it so much.

    Ingredients
    1 medium radish
    300g of ribs
    1 tbsp. oil
    1/2 tbsp. of bean paste
    2 cm of ginger
    5 pieces of cloves
    3cm of cinnamon stick
    2 pieces of star anise
    500ml water
    Soya sauce to taste
    Brown sugar to taste

    1. Boil a small pot of water to scald the ribs. This is to remove all the blood traces. Set aside.

    2. Clean the radish and cut the radish into big pieces.

    3. In a separate pot, heat up the oil and then, put in ginger and bean paste. When it is fragrant, put in the rib and stir fry for a few minutes until outside later of meat is cooked.

    4. Add in cloves, cinnamon stick and star anise and water.

    5. When the water is boiling, put in all the radish and simmer with small fire till all the radish is soft.

    6. You may serve with rice.


    Monday, 16 December 2013

    Pandan Chiffon Cake (Extra soft)

    I  have been trying a lot of different recipes and fine tune my technique in order to bake a soft and fluffy Chiffon Cake. It takes me about 2 years to master this cake. Although I have failed a lot of times, my passion towards baking will never die. I would say baking Chiffon Cake needs some luck. Today, you may bake it successful but the next day you may fail even though you are using the same recipe. Below are some notes that may help you master in Chiffon Cake.
    I would say, having a perfect stiff egg white is the secret of baking this cake. Without a perfect stiff egg white, you will never get the soft texture of Chiffon Cake. The eggs need to be at room temperature so they will reach their full volume when beaten. Always use fresh egg as it is much easier to beat. Adding a little cream of tartar helps with us, although you can leave it out. Cream of tartar is used to give stiffness to the egg whites, so that the cake will not collapse easily. Not to forget to use a very clean mixing bowl to ensure egg whites can be whisked up easily until very stiff.
    Another important ingredient in the cake is the oil. The presence of oil and coconut milk in the recipe will give a moist texture to the cake. Coconut milk used in the recipe will further enhance the taste of the cake. You may substitute with soya, however the taste will never be the same as compare with coconut milk. As for the oil, you can use any flavourless oil; vegetable, canola, corn or even sunflower oil.
    To make the cake healthier, it is highly encourage to use home made pandan juice than using green coloring and pandan essence. With the help of a blender, extracting pandan juice from the plant is much easier. I would normally stored the pandan juice for overnight before using. On the next day, a layer of  concentrated pandan residue will settle at the bottom. I will normally use that layer as it has a stronger taste.
    It is important that the batter is baked in an ungreased tube pan which allows the batter to cling to the sides of the pan as it bakes. The tube in the center of the pan lets the hot air circulate so the heat can reach the center of the bake and not over bake the cake. The cake needs to be turned upside down immediately upon removing it from the oven as this keeps from shrinking and losing its volume.

    Hopefully you will also succeed with the baking! 
    ------------------------------------------------------------------------------------------------------------------------
    Ingredients A
    100g cake flour
    1 tsp baking powder
    5 medium eggs yolks
    40g castor sugar
    1/4 tsp salt
    30ml oil
    60ml coconut juice
    50ml concentrated pandan juice
    1/2 tsp pandan essence (optional)
    Ingredients B
    5 medium egg whites
    1/2 tsp cream of tartar
    40g castor sugar
    1. Preheat the oven to 150'C and have ready a 22cm ungreased chiffon cake tin.

    2. Sieve cake flour and baking powder together. Put aside.

    3. Whisk egg yolks and castor sugar together until the batter is pale yellow. Add in the salt, oil, coconut juice, pandan juice and pandan essence together. Stir in one direction until smooth and well-combined. Mix this mixture into the flour.

    4. Beat until smooth (about one minute). Scrape down the sides of the bowl as needed.

    5. You may filter the batter if there are a lot of lumps.

    6. In the other bowl, put in egg whites and cream of tartar into a clean mixing bowl. Use high speed to whisk until frothy. Add in sugar slowly. Continue to whisk until stiff but not dry. (Please refer to the video "How to whip egg white")

    7. Gently fold the stiff egg whites (in three additions) into cake batter just blended (being careful not to deflate the batter). (Please refer to the video "How to fold egg white")

    8. Pour the batter into a 22cm ungreased chiffon cake pan and bake at 150'C for about 30 minutes until lightly brown. Change to 180'C and continue to bake until 100% cooked and golden brown.


    9. Remove from oven, invert (turn upside down) and leave to cool completely before removing cake from the tin.


    Sunday, 1 December 2013

    How to whip egg white

    The process of whipping egg white is very important. A steady stiff egg white contains a lot of fine bubble trapped inside. This bubble is important to hold the cake mixture.

    The following video shows how to whip egg white. This method implies for every recipe that requires stiff egg white.

    Tips:
  • Eggs at room temperature whip better than eggs straight out of the fridge.
  • Try to use fresh egg as it is easier to whip


  • Saturday, 30 November 2013

    Pandan Layer Cake

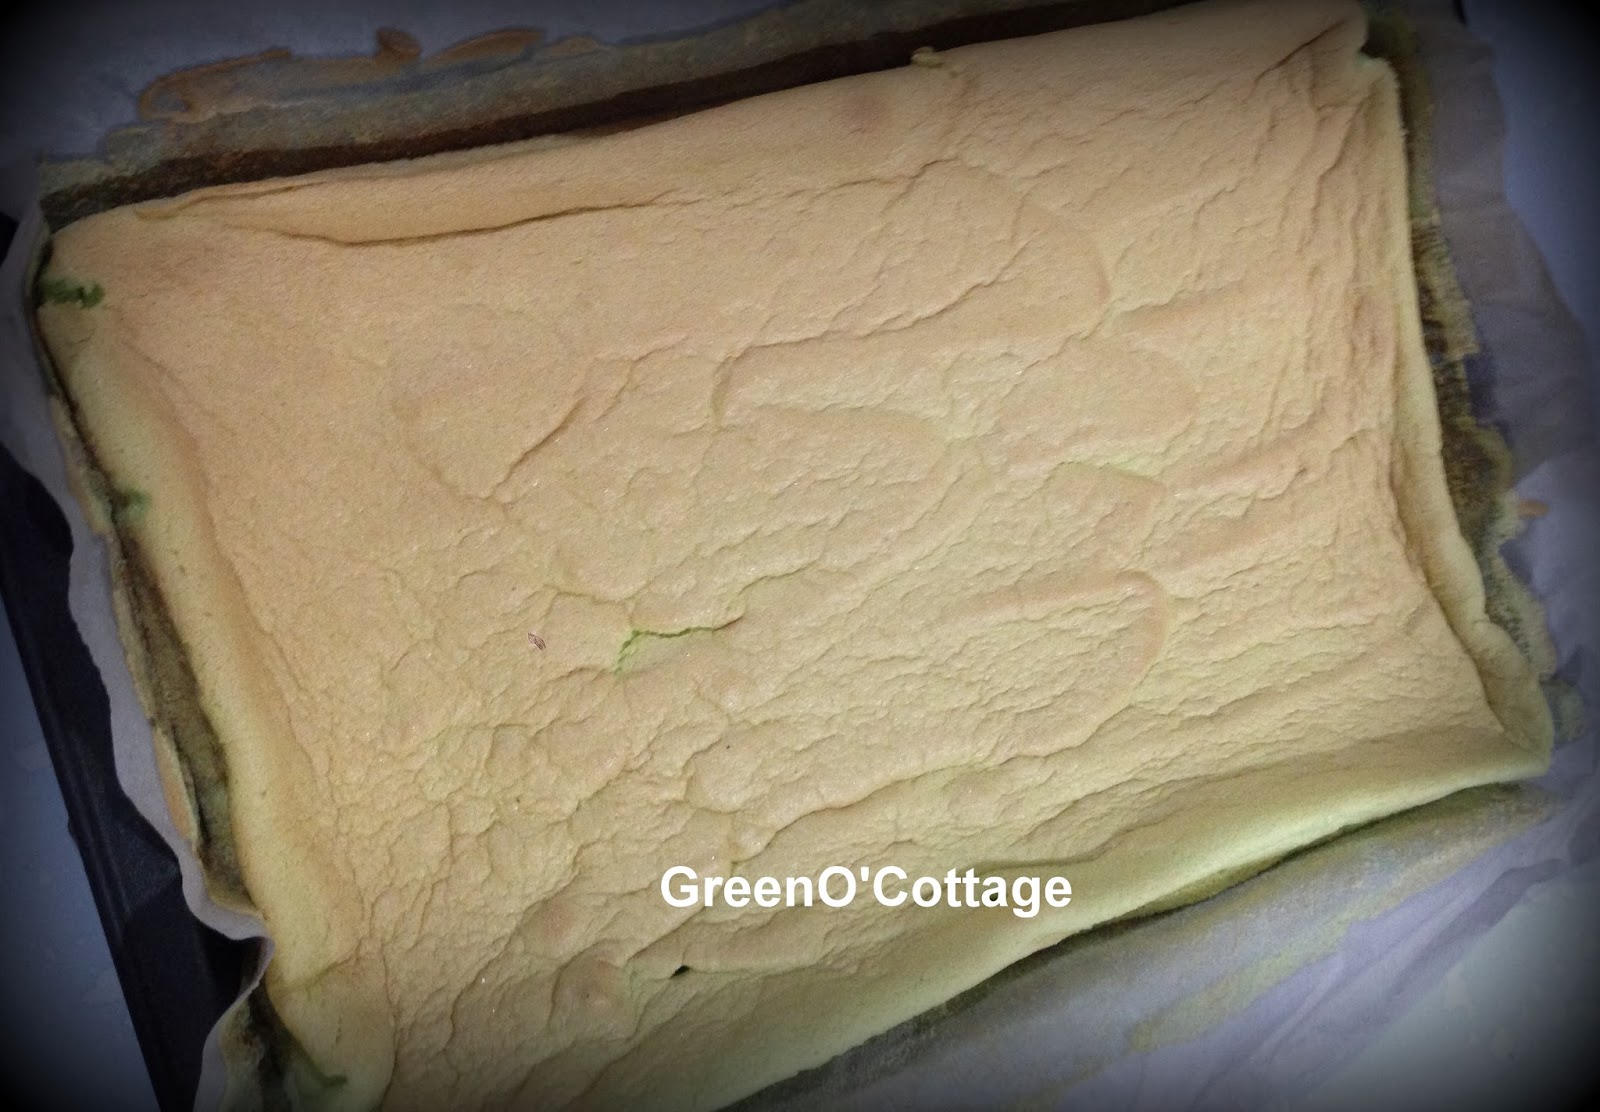
    Pandan Layer Cake is made from a layer of sponge and custard. It has to be fridge before consuming it. Since the custard layer is made from coconut milk, it has a very rich flavour. Fresh coconut milk is the best to be used in this recipe. You may substitute coconut milk with soya or milk if you do not like taste of coconut. Pandan juice used in this recipe will enhance the fragrant and colouring.

    Ingredients: Sponge layer
    100 gram cake flour
    1 tsp baking powder
    5 medium eggs (separate the yolks and white eggs)
    50 gram oil
    60ml coconut milk
    40ml pandan juice
    1/2 tsp pandan essense
    75 gram sugar
    1/4 tsp salt
    1/2 tsp of tartar

    1. Preheat oven to 165'C.
    2. Sieve the cake flour and baking powder.
    3. In a separate bowl, beat the yolks together with 1/3 of the sugar with a whisk until the mixture becomes pale.
    4. Slowly mix in the oil, coconut milk, pandan juice and pandan essense with a spatula.
    5. Mix until the mixture is homogenous and keep aside.
    6. In a clean bowl, whisk the egg white until bubbles starts to appear. Add in cream of tartar and continue to whisk using high speed. After the cream of tartar blends well with the eggs (takes around und 10 second), add in 1/3 of sugar and continue with high speed. The remainder of the sugar should be added in after the earlier sugar blend well with the eggs. (Make sure that there is no yolk in the white egg).
    7. Continue with high speed until they are uniformly white and stiff but soft peaks. This is a critical step for this cake as the white egg needs to hold the cake mixture in order to give a soft cake texture.

    (Tips: You can test the readiness of the white eggs by checking the texture around the whisk. It is ready if the white eggs is stiff and able to hold its shape. Only the tip is curling back when we hold the whisk in up-right position).
    Please refer to the video on "How to whip egg white" for more information.


    8. Put about 1/3 of the whipped egg white into the batter, and mix it into the batter. Using a large spatula, cut a path down the middle of the mixture with the edge of the spatula. Then gently turn half the mixture over on the other half. Continue cutting down the middle and turning a portion over. Do not stir. The purpose of the folding is to retain the air you have beaten into the whites. Be careful to only work the cake mixture enough to incorporate the whites, and never use an electric mixer for this step. Continue with this process until all the entire egg white is blended well with the cake mixture.

    9. Pour the batter into a 9"x13" pan. Use a spatula to flatten the batter surface. Bake the batter in a preheated oven for 30 minutes or the batter is done.

    10. You may check the cake readiness by inserting a toothpick into the center of the cake. If there is any wet batter clinging to the toothpick, the cake is not ready yet. You may perform the toothpick test again in another five minutes. If nothing sticks to the toothpick, the cake is ready to be taken out of the oven.

    11. Remove the cake from the pan and allow to cool on the wire cooling rack until it is ready to serve or store.


     Ingredients: Custard layer
    6 tbsp. of hoen kwe powder
    400 ml pandan juice (I am using a whole bunch of pandan leaves)
    350ml coconut milk
    3 tsp instant jelly powder
    100g sugar
    1/4 tsp salt
    1/2 tsp pandan essence (optional)

    1. Mix jelly powder, sugar, salt together with pandan juice and coconut milk. Keep it aside for 30 minutes. This will help the jelly to dissolve easier later.
    2. After 30 minutes, mix in the hoen kwe powder.
    3. Heating up the mixture using low heat and cook until the mixture is thick. Add in the essence.
    4. You may strain the batter to remove any lumps that may have formed.
     To assemble:
    1) Divide the sponge layer into 3 pieces.
    2. Place a slice of cake into a container and pour 1/3 of the custard filling onto the cake.  Repeat layering of cake and custard filling (2x).  
    3) Cool the cake first before placing in the fridge to set.